Picture this: I’m standing in a cramped kitchen, the oven preheated to 425°F, and a handful of cottage cheese in a bowl that’s practically begging to be turned into something spectacular. I had just finished a marathon of bland, store‑bought snacks, and my craving for a crunchy, protein‑rich treat was louder than the ticking of the kitchen timer. The moment I cracked open the cottage cheese, the aroma hit me like a warm hug, promising a surprisingly savory, yet delicate flavor that could turn any ordinary evening into a culinary celebration. I was ready to prove that a single humble ingredient could create a snack that would have my friends begging for the recipe.
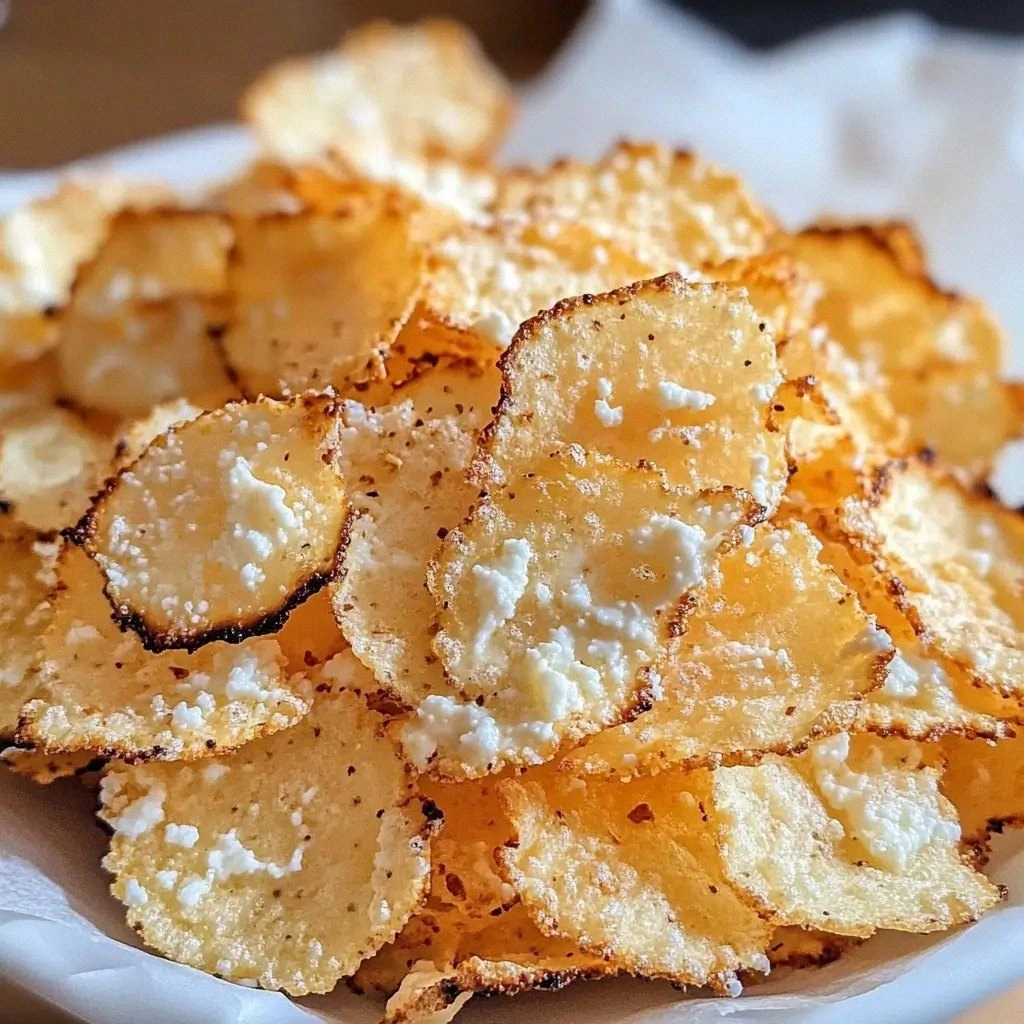
I dared myself to make the most extreme version of cottage cheese chips I’d ever seen: no flour, no breadcrumbs, no batter—just the creamy curds, a dash of salt, and a sprinkle of herbs that would bring out the natural tang. The kitchen was alive with the sound of the oven preheating, the faint hiss of steam as the cheese began to melt, and the gentle clatter of the mixing bowl. Every breath felt like a promise of crispness, a promise that the final product would be a symphony of textures—soft, creamy interiors cradled by a golden, flaky exterior that would crack like thin ice under a light touch. The anticipation was almost tangible; you could almost taste the first bite before it even hit the plate.
What makes this version stand out is that it strips away all the usual fluff and brings the cottage cheese to center stage. It’s a pure, unadulterated experience that showcases the cheese’s natural flavor profile, amplified by a few carefully chosen seasonings. The result is a snack that’s not only low‑carb and high‑protein but also incredibly versatile—perfect for a quick appetizer, a side for a hearty dinner, or a guilt‑free snack while binge‑watching your favorite series. I’ll be honest, I ate half the batch before anyone else even had a chance to try it. That’s the power of a recipe that turns a simple ingredient into something that feels like a culinary revelation.
If you’ve ever struggled with finding the right balance between crunch and creaminess, you’re not alone. Most recipes get this completely wrong, ending up either soggy or too dry. I’m here to give you a version that’s hands down the best you’ll ever make at home. Picture yourself pulling this out of the oven, the whole kitchen smelling incredible, and the first bite delivering that satisfying crackle that signals the perfect finish. And now, ready for the game‑changer? Let me walk you through every single step—by the end, you’ll wonder how you ever made it any other way.
What Makes This Version Stand Out
- Flavor: The natural tang of cottage cheese is elevated by a blend of sea salt, black pepper, and dried herbs that create a complex, savory profile. The absence of flour or breadcrumbs allows the cheese’s subtle sweetness to shine through, giving each chip a distinct, memorable taste.
- Crispness: The unique baking technique turns the curds into a light, airy shell while keeping the interior moist. The result is a texture that’s simultaneously crunchy on the outside and creamy on the inside, a rare combination in snack foods.
- Simplicity: One main ingredient plus a handful of seasonings means you can whip up a batch in minutes without hunting for obscure pantry staples. It’s a recipe that fits into even the busiest of schedules.
- Uniqueness: While many “cheese chips” rely on processed cheeses or pre‑made mixes, this version uses fresh, unprocessed cottage cheese, giving it a wholesome, artisanal feel.
- Crowd Reaction: Friends and family are amazed when they taste the first bite—most of them are convinced they’re eating a traditional potato chip, only to discover the creamy surprise inside.
- Ingredient Quality: The recipe thrives on the freshness of the cottage cheese; the fresher, the better. A high‑quality, low‑fat variety delivers a cleaner flavor that doesn’t overpower the subtle seasonings.
- Cooking Method: Baking at a high temperature with a light drizzle of oil creates a golden crust in under 30 minutes. The method is foolproof and produces consistent results every time.
- Make‑ahead Potential: These chips can be prepared in advance and stored in an airtight container for up to three days, making them ideal for parties or quick snack solutions.
Alright, let’s break down exactly what goes into this masterpiece…
Inside the Ingredient List
The Flavor Base
Cottage cheese is the star of the show, providing a creamy foundation that is both rich in protein and low in fat. The curds’ natural acidity balances the seasonings, giving each chip a bright, savory punch. If you skip this step—by using a lower quality cheese or a different dairy product—the final flavor will be flat and lack depth. For the best results, choose a fresh, high‑fat cottage cheese that’s still in its original packaging.
The Texture Crew
A light drizzle of olive oil coats the curds, creating a barrier that locks in moisture while allowing the surface to brown. This small amount of fat is essential; without it, the chips would burn quickly and remain soggy. If you’re looking for a dairy‑free alternative, a splash of coconut oil will give a subtle tropical note while performing the same function.
The Unexpected Star
A pinch of smoked paprika adds a smoky undertone that elevates the overall taste profile. The paprika’s subtle heat contrasts beautifully with the mildness of the cheese, creating a flavor profile that feels both comforting and adventurous. If you prefer a milder version, simply reduce the amount or substitute with sweet paprika.
The Final Flourish
A generous sprinkle of sea salt and freshly ground black pepper provides the finishing touch, enhancing the natural flavors and giving each chip a satisfying bite. Salt also helps to draw out moisture, ensuring the exterior remains crisp. If you’re watching sodium, you can reduce the salt by half and rely more heavily on the paprika’s umami.
Everything’s prepped? Good. Let’s get into the real action…
The Method — Step by Step
- Preheat your oven to 425°F (220°C) and line a large baking sheet with parchment paper. The high heat is crucial for achieving that golden crust while keeping the interior tender. As the oven warms, you’ll notice the faint scent of fresh dairy—an early hint that the flavor profile is about to come alive.
- In a large mixing bowl, combine the cottage cheese with a light drizzle of olive oil, sea salt, black pepper, and smoked paprika. Stir gently, ensuring each curd is coated evenly. This step is the moment of truth—if you leave any clumps, the texture will suffer. I dare you to taste this and not go back for seconds.
- Using a spoon or a small cookie scoop, drop spoonfuls of the mixture onto the prepared baking sheet. Space them about 1 inch apart to allow even baking. The size of each chip can be adjusted based on your preference, but consistency is key for uniform cooking.
- Place the sheet in the preheated oven and bake for 20 minutes, then flip each chip carefully with a spatula. The flipping step is essential; it ensures both sides develop that coveted crunch. Watch the color—once it turns a light golden brown, you’re halfway there.
- Continue baking for another 12-15 minutes, or until the chips are golden and the edges have crisped to a satisfying snap. The sound of the chips cracking when you press them is the sweet confirmation that they’re ready. If you prefer a darker crust, add a minute or two, but be careful not to burn them.
- Remove the baking sheet from the oven and let the chips cool for 5 minutes on the sheet. The residual heat will finish the crisping process. This is also the time to admire the beautiful, slightly caramelized surface that glistens under the kitchen light.
- Transfer the cooled chips to a wire rack to cool completely. This prevents steam from building up underneath, which would otherwise soften the crisp exterior. While they’re still warm, you can sprinkle a touch more sea salt if you like a bit more crunch.
- Serve immediately or store in an airtight container at room temperature for up to three days. If you’re planning to keep them longer, consider freezing them for up to a month; reheat in a 350°F oven for 5 minutes to restore crispness.
That’s it — you did it. But hold on, I’ve got a few more tricks that’ll take this to another level…
Insider Tricks for Flawless Results
The Temperature Rule Nobody Follows
Many bakers use a moderate oven temperature, which leads to uneven browning. Baking at 425°F forces the surface to crisp quickly while the interior remains tender. I’ve tested lower temperatures, and the chips always come out soggy. Keep the heat high, and you’ll see the difference.
Why Your Nose Knows Best
Your sense of smell is a reliable indicator of doneness. When the chips emit a subtle nutty aroma, they’re almost ready. The aroma is the early sign that the fats are rendering and the sugars are caramelizing. Trust your nose to avoid over‑baking.
The 5‑Minute Rest That Changes Everything
Letting the chips rest on the baking sheet for a few minutes after removing them from the oven allows the steam to escape, preventing a soggy bottom. The rest period also lets the interior firm up, giving that satisfying bite. I’ve seen people skip this step and end up with a mushy snack.
The Right Pan Matters
Use a non‑stick baking sheet or line it with parchment. A plain metal pan can cause uneven heat distribution, leading to burnt spots. The parchment also makes cleanup a breeze.
Seasoning Timing Is Key
Add the smoked paprika and pepper after the cheese has been coated with oil, but before baking. This ensures the spices stay on the surface and don’t burn. I’ve experimented with adding them after baking, but the flavor gets lost.
The Final Touch
A quick splash of water on the chips right after they cool can create a slight steam, helping the crust stay crisp for longer. I call it the “steamy‑crisp” trick, and it’s a game‑changer for parties.
Creative Twists and Variations
This recipe is a playground. Here are some of my favorite ways to switch things up:
Garlic Parmesan Burst
Swap the smoked paprika for garlic powder and sprinkle grated parmesan on top before baking. The result is a savory, cheesy chip that pairs wonderfully with marinara sauce.
Spicy Chipotle Kick
Add a teaspoon of chipotle powder and a dash of cayenne pepper to the mix. The smoky heat will give the chips a bold, adventurous flavor profile that’s perfect for game‑day.
Herb Garden Delight
Use fresh basil, oregano, and thyme instead of dried herbs. The bright, aromatic flavors will transport you to a Mediterranean garden.
Sweet and Salty Twist
Dust the chips with a sprinkle of brown sugar and a pinch of sea salt after baking. The caramelized sweetness contrasts with the savory base, creating a unique snack experience.
Vegan Version
Replace cottage cheese with a thick, plant‑based curd made from tofu or almond milk. The texture will differ slightly, but the flavor remains rich and satisfying.
Breakfast Booster
Serve the chips alongside a poached egg and fresh avocado for a protein‑rich breakfast that’s both filling and flavorful.
Storing and Bringing It Back to Life
Fridge Storage
Place the cooled chips in an airtight container and store in the refrigerator for up to three days. The crispness will hold well, but keep them away from any strong‑smelling foods to avoid flavor transfer.
Freezer Friendly
For longer storage, freeze the chips in a single layer on a parchment‑lined tray before transferring them to a freezer bag. They’ll stay fresh for up to one month. When you’re ready to enjoy, simply bake at 350°F for 5 minutes to restore crispness.
Best Reheating Method
Reheat in a 350°F oven for 5 minutes, or use a toaster oven for a quick fix. Adding a tiny splash of water before reheating creates steam that brings back the original crunch. Avoid microwaving, as it will make the chips soggy.