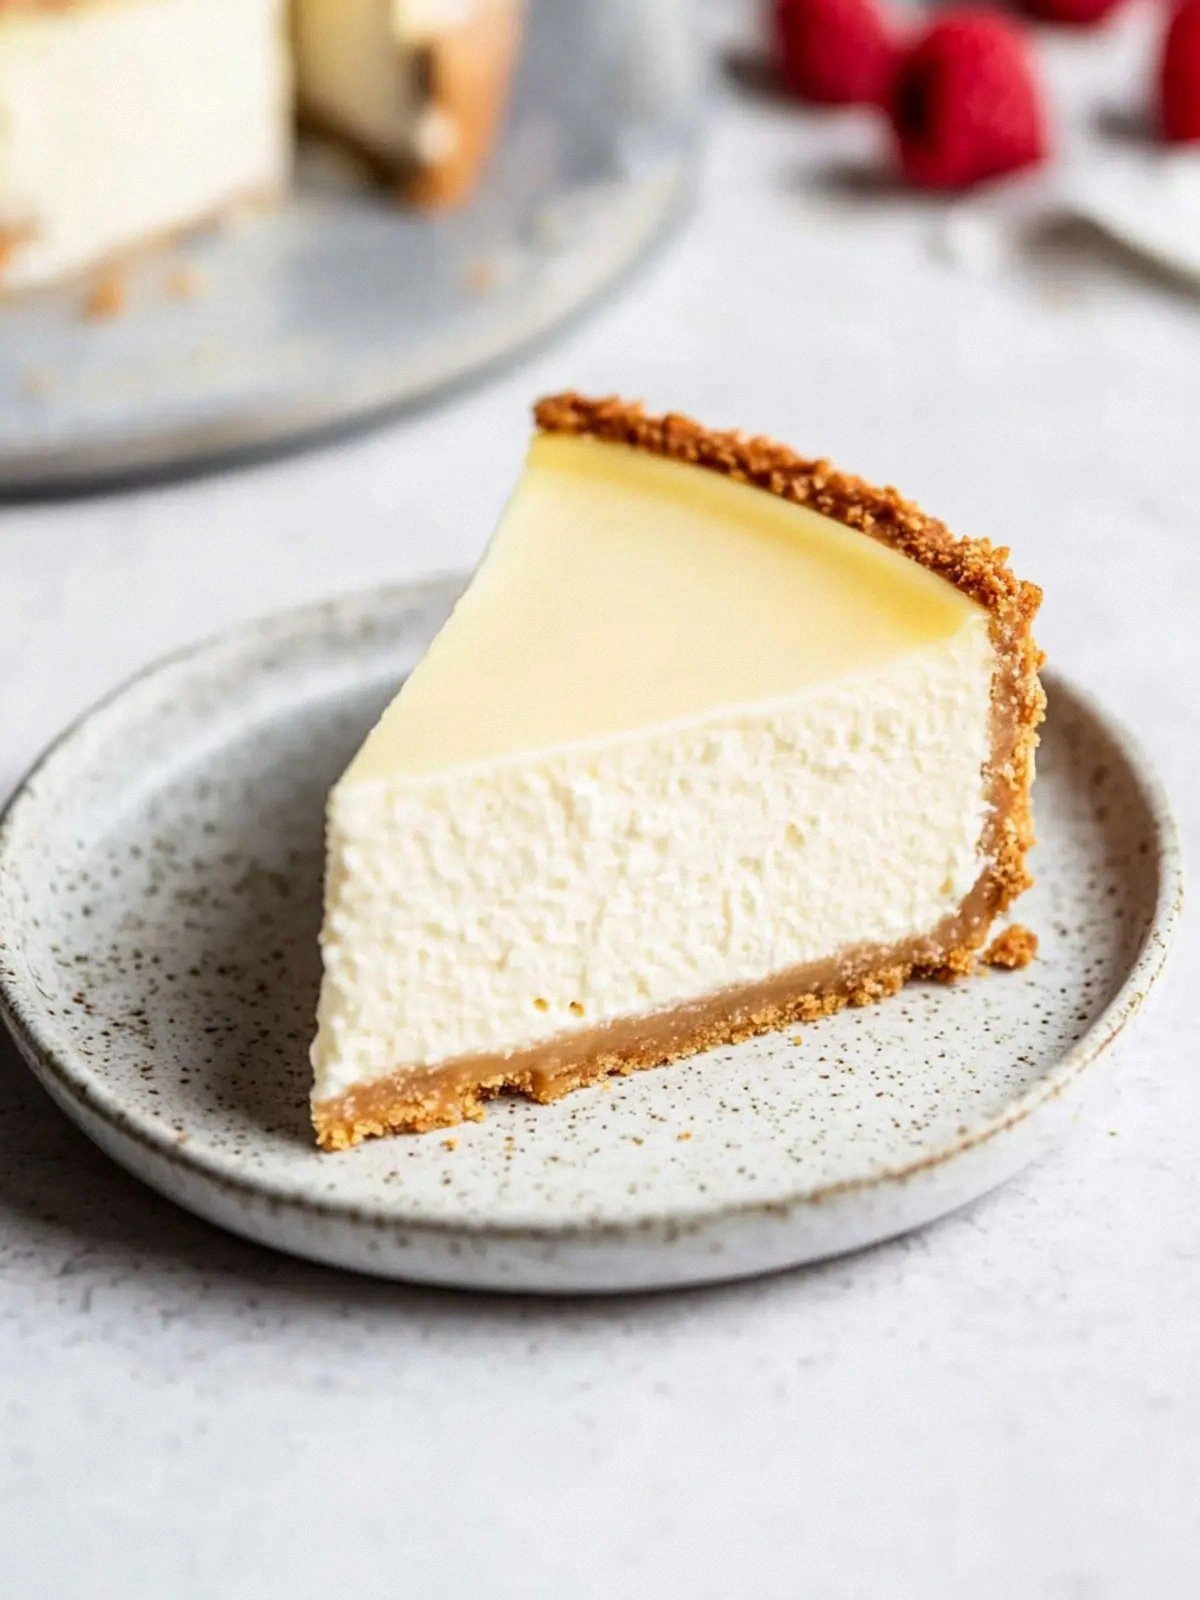
The kitchen was alive with the buttery scent of melted butter mingling with the sharp, sweet aroma of graham crackers. I could hear the rhythmic clink of spoon against bowl as the mixture thickened, a faint crackle from the oven when I slid the pan inside. The texture was a dream: a silky center that swirls like velvet, a crust that crumbles with a satisfying snap. Every bite was a revelation, a marriage of creamy richness and subtle tang, leaving a lingering warmth on the tongue.
What sets this version apart from the endless variations you find online is the precise balance of ingredients and the methodical approach to baking. I’ve trimmed the recipe to its core essentials—no unnecessary additives, no gimmicky ingredients—yet the result is a cheesecake that feels indulgent without being overpowering. The secret lies in the combination of full‑fat cream cheese, a touch of yogurt, a light flour binder, and a carefully measured crust.
I dare you to taste this and not go back for seconds. I’ll be honest— I ate half the batch before anyone else got to try it. Most recipes get this completely wrong, but here’s what actually works: a buttery crust that holds up, a creamy filling that sets perfectly, and a finish that glistens with a subtle caramelized edge. Picture yourself pulling this out of the oven, the whole kitchen smelling incredible, and the first slice sliding out like a piece of cloud. Let me walk you through every single step—by the end, you’ll wonder how you ever made it any other way.
What Makes This Version Stand Out
- Taste: The flavor profile is a harmonious blend of sweet and tang, with a buttery graham base that provides a subtle crunch. The vanilla note lingers, giving the cheesecake an unmistakable depth that elevates it beyond ordinary.
- Texture: This cheesecake boasts a silky, almost custard‑like mouthfeel that melts in your mouth, while the crust remains crisp yet tender. The result is a contrast that excites every bite.
- Ingredient Quality: Using full‑fat cream cheese and fresh yogurt ensures a rich, velvety filling, while premium graham crackers deliver a buttery crunch that stands out from generic crusts.
- Simplicity: With only ten ingredients, the recipe remains approachable for beginners, yet it delivers a complex flavor that satisfies seasoned bakers.
- Crowd Reaction: Guests rave about the creamy center and the caramelized edges, and the recipe scales beautifully for parties or intimate gatherings.
- Make‑Ahead Potential: The cheesecake can be prepared a day in advance and refrigerated without losing its texture, making it an excellent option for busy hosts.
Inside the Ingredient List
The Flavor Base
Graham cracker crumbs form the foundation of the crust, providing a sweet, buttery base that complements the creamy filling. The 1 1/2 cups of crumbs are essential; cutting them short will leave the crust too thin and crumbly, while adding more could overwhelm the cheesecake’s delicate flavor. For a subtle twist, mix in a pinch of cinnamon or nutmeg, but be careful not to overpower the vanilla.
The Texture Crew
Full‑fat cream cheese is the star of the show, delivering a rich, velvety texture that sets perfectly. The 24 oz of cream cheese is measured in ounces for precision; converting to grams (about 680 g) can be handy if you’re a metric user. Skipping this ingredient will turn your cheesecake into a watery disappointment, so keep it at the forefront.
The Unexpected Star
Plain yogurt or sour cream adds a subtle tang and a lightness that counterbalances the richness of the cream cheese. Using 1/2 cup of yogurt is crucial; too little, and the cheesecake feels heavy, too much, and it becomes overly tart. If you prefer a dairy‑free version, Greek yogurt works well, but remember to adjust the flour slightly to maintain structure.
The Final Flourish
All‑purpose flour binds the filling and prevents cracking during baking. The 1/4 cup is a small but vital amount; omitting it can lead to a fragile cheesecake that tears when sliced. You can experiment with cornstarch for a gluten‑free version, but keep the ratio the same to preserve the filling’s integrity.
Everything's prepped? Good. Let's get into the real action…
The Method — Step by Step
- Preheat your oven to 325°F (160°C) and line a 9‑inch springform pan with parchment paper. This step ensures a clean release and a perfectly even crust. While the oven warms, mix the graham cracker crumbs with the 1/4 cup sugar in a bowl; the sugar will caramelize slightly during baking, adding depth to the crust. Add the 1/2 cup melted butter and stir until the crumbs are evenly coated. Press the mixture firmly into the bottom of the pan, creating a solid base that will hold the filling. Let the crust set aside while you prepare the filling.
- In a stand mixer, beat the full‑fat cream cheese on medium speed until smooth and creamy, about 2 minutes. A smooth base prevents lumps and ensures a silky texture. Gradually add 1 cup of granulated sugar, 1 tsp vanilla extract, and 1/2 cup yogurt, mixing until fully incorporated. The yogurt’s acidity will help the cheesecake set without cracking. Add the 1/4 cup flour and beat again until the batter is uniform. Finally, fold in the 4 large eggs, one at a time, ensuring each is fully mixed before adding the next to avoid curdling.
- Pour the batter over the prepared crust, smoothing the top with a spatula. The batter should spread evenly, covering the entire crust. This is the moment of truth—your cheesecake’s foundation is set. Tap the pan gently on the counter to release any air bubbles that might cause cracks later. Place the pan in the oven and bake for 45 minutes, or until the edges are set and the center still has a slight wobble. This gentle bake ensures a creamy interior.
- Remove the cheesecake from the oven and immediately run a kitchen towel around the rim of the pan to cool. This prevents the edges from cracking due to sudden temperature change. Let the cheesecake rest at room temperature for 1 hour, then cover with plastic wrap and refrigerate for at least 4 hours, preferably overnight. The cold temperatures allow the flavors to meld and the texture to firm up. When you’re ready to serve, remove the springform ring carefully to avoid tearing the delicate crust.
- Before serving, slice the cheesecake with a hot, wet knife for clean cuts. Dip the knife in hot water, wipe it dry, then slice. This technique keeps the knife from pulling at the filling. Arrange slices on a platter and garnish with fresh berries or a drizzle of caramel sauce if desired. The visual appeal adds a touch of elegance that elevates this classic dessert to a showstopper. Remember, the first bite is the most important—let it melt on your tongue.
- If you’re hosting a crowd, consider adding a subtle swirl of raspberry jam or a dusting of cocoa powder for a decorative touch. These accents not only enhance flavor but also create a visual contrast that makes the cheesecake pop. Keep the garnish simple; the focus should remain on the creamy center and buttery crust. Serve at room temperature for the best texture. Enjoy the applause from your guests as they savor the velvety richness.
- For a lighter version, replace the full‑fat cream cheese with a mix of 50% low‑fat and 50% full‑fat. The result is a cheesecake that’s still creamy but with a slightly lower calorie count. However, be aware that the texture may be less dense, so adjust the baking time accordingly. This tweak is ideal for those who want to indulge without the guilt.
- If you want a stronger vanilla flavor, add an extra 1/2 tsp of vanilla extract. The extra depth will permeate the filling, making each bite more aromatic. Use a high‑quality vanilla bean or extract to avoid a chemical aftertaste. This small change can transform the cheesecake into a more decadent dessert.
That's it — you did it. But hold on, I've got a few more tricks that'll take this to another level…
Insider Tricks for Flawless Results
The Temperature Rule Nobody Follows
Bake at a steady 325°F (160°C) and avoid opening the oven door during the first 30 minutes. The sudden temperature change can cause the cheesecake to crack. Use an oven thermometer to confirm the temperature stays consistent. This simple step ensures a smooth, crack‑free surface every time.
Why Your Nose Knows Best
Before removing the cheesecake, smell the edges—if they have a faint caramel aroma, the crust is perfectly browned. A sweet, buttery scent signals the right balance of sugar and butter. If the smell is overly sweet, lower the oven temperature slightly or reduce the sugar in the crust.
The 5‑Minute Rest That Changes Everything
After baking, let the cheesecake sit in the oven with the door ajar for 5 minutes. This brief rest allows the heat to dissipate gradually, preventing the edges from cracking. It also gives the filling a chance to set slightly before cooling, ensuring a firmer bite.
The Secret of a Silky Finish
Whisk the yogurt into the batter until it’s completely smooth before adding the eggs. Any lumps can cause a grainy texture. Use a handheld mixer for a quick, even incorporation. The result is a silky, custard‑like center that melts on the tongue.
The Final Flour Touch
Sift the flour before adding it to the batter to avoid clumps. A smooth batter means a smoother cheesecake. Keep the flour to the exact 1/4 cup; too much will make the filling dense, too little will cause cracks.
Creative Twists and Variations
This recipe is a playground. Here are some of my favorite ways to switch things up:
Berry Burst Cheesecake
Swirl fresh blueberries or strawberries into the batter before baking. The fruit adds a burst of natural sweetness and a pop of color. Let the berries sit on top of the batter for a few minutes so they caramelize slightly. This version is perfect for spring or summer gatherings.
Chocolate Truffle Layer
Fold in 1/2 cup of melted dark chocolate into the batter for a rich, chocolatey twist. The chocolate complements the vanilla and cream cheese, creating a decadent flavor profile. For an extra indulgence, drizzle a ganache on top after baking.
Lemon Zest Surprise
Add 1 tablespoon of lemon zest and 2 tablespoons of lemon juice to the batter. The citrus brightens the cheesecake, cutting through the richness. Pair it with a lemon glaze for a tangy finish.
Nutty Crunch Add‑In
Incorporate 1/2 cup of chopped pecans or walnuts into the crust. The nuts provide a delightful crunch and a nutty flavor that pairs well with the creamy center. Toast the nuts lightly before adding for an extra depth of flavor.
Salted Caramel Drizzle
After the cheesecake has cooled, drizzle a salted caramel sauce over the top. The caramel adds a sweet, buttery layer, while the sea salt brings out the flavors of the crust and filling. This simple topping elevates the dessert to a gourmet experience.
Storing and Bringing It Back to Life
Fridge Storage
Wrap the cheesecake tightly in plastic wrap and store it in the refrigerator for up to 5 days. The cool environment keeps the filling firm without drying it out. Before serving, let the cheesecake sit at room temperature for 30 minutes to enhance flavor and texture.
Freezer Friendly
For longer storage, wrap the cheesecake in foil and then in a freezer bag. It can be frozen for up to 3 months. When ready to serve, thaw in the refrigerator overnight. The texture remains creamy, and the flavor stays intact.
Best Reheating Method
Reheat the cheesecake in a preheated 325°F oven for 10 minutes if you prefer a warm slice. To keep the center moist, add a tiny splash of water to the bottom of the baking dish. The steam helps maintain the cheesecake’s creamy texture without drying it out.