Picture this: a kitchen full of smoke, a burnt chicken that looked like a sad, brown blob, and a friend who dared me to make something better. I stared at the charred remains, feeling the heat of disappointment rise like a simmering pot. The next day, I was determined to transform that failure into a culinary triumph. I rummaged through the pantry, pulled out my secret weapon—Romano cheese—and vowed to create a dish that would make even the most skeptical foodies swoon. If you’ve ever wondered how to turn a kitchen disaster into a crowd‑pleasing masterpiece, keep reading, because I’m about to reveal the recipe that will change the way you cook chicken forever.
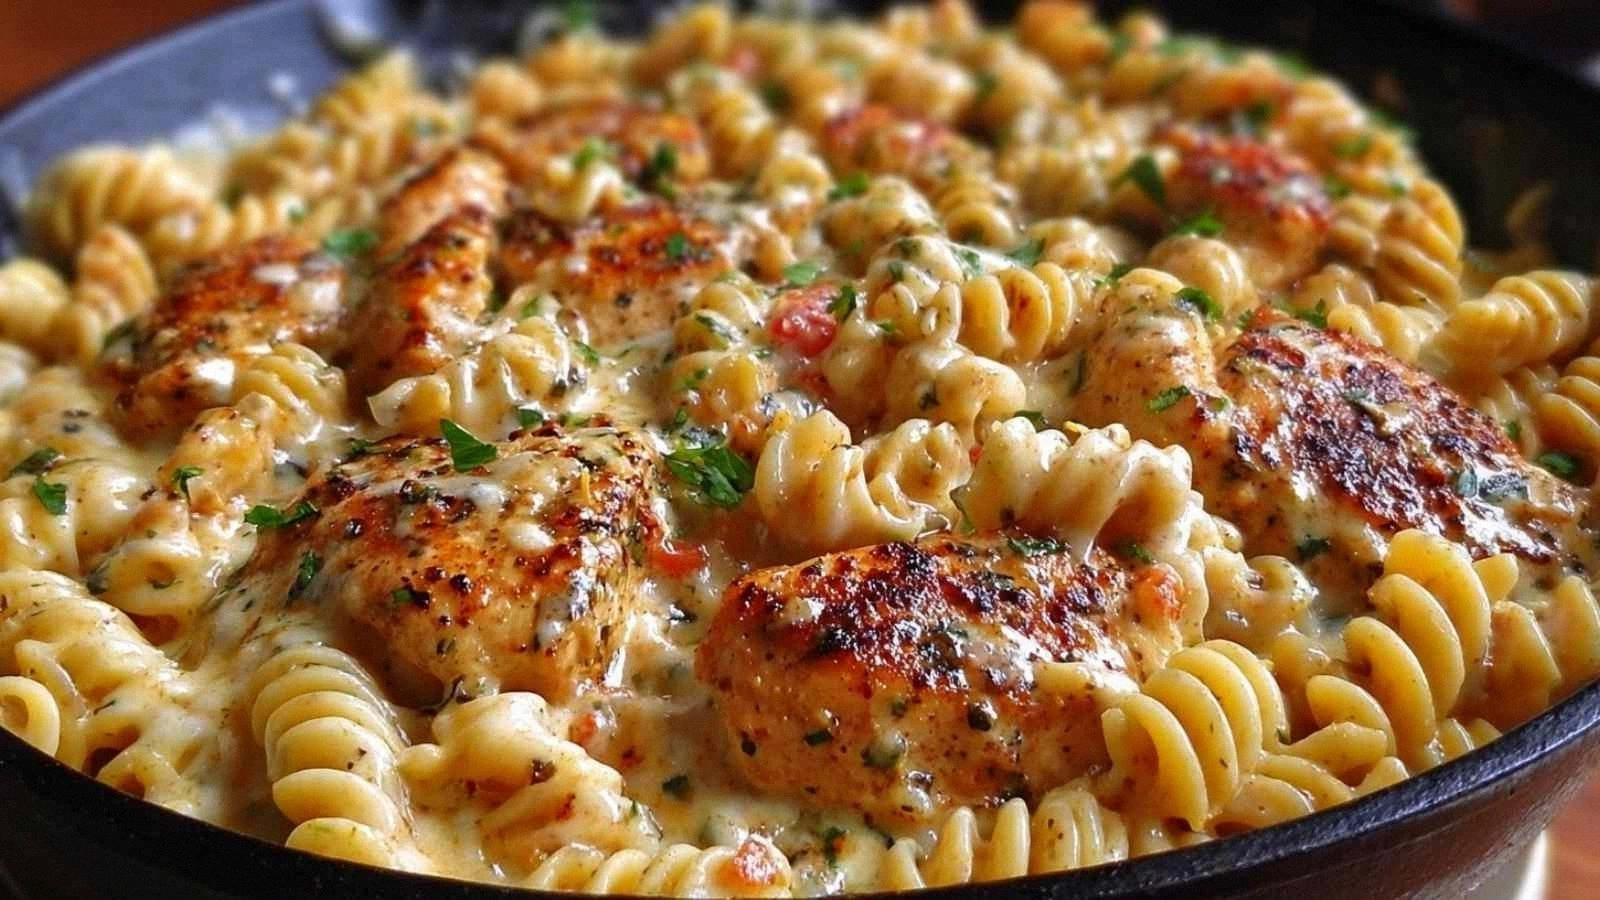
The aroma that will soon fill your home is nothing short of a love letter to comfort food. Imagine the sharp, buttery tang of Romano melting over a golden crust, the subtle warmth of paprika dancing with garlic powder, and the fresh, citrusy zing of lemon wedges that lift every bite. That scent alone will pull you in, while the sight of the chicken, perfectly coated, glistening under the oven light will make your mouth water. The sound of the first crisp crack as the coating hits the hot pan will give you that instant dopamine hit that tells you you’re on the right track. And the texture—crunchy on the outside, succulent on the inside—will keep you reaching for seconds even when you’re already full.
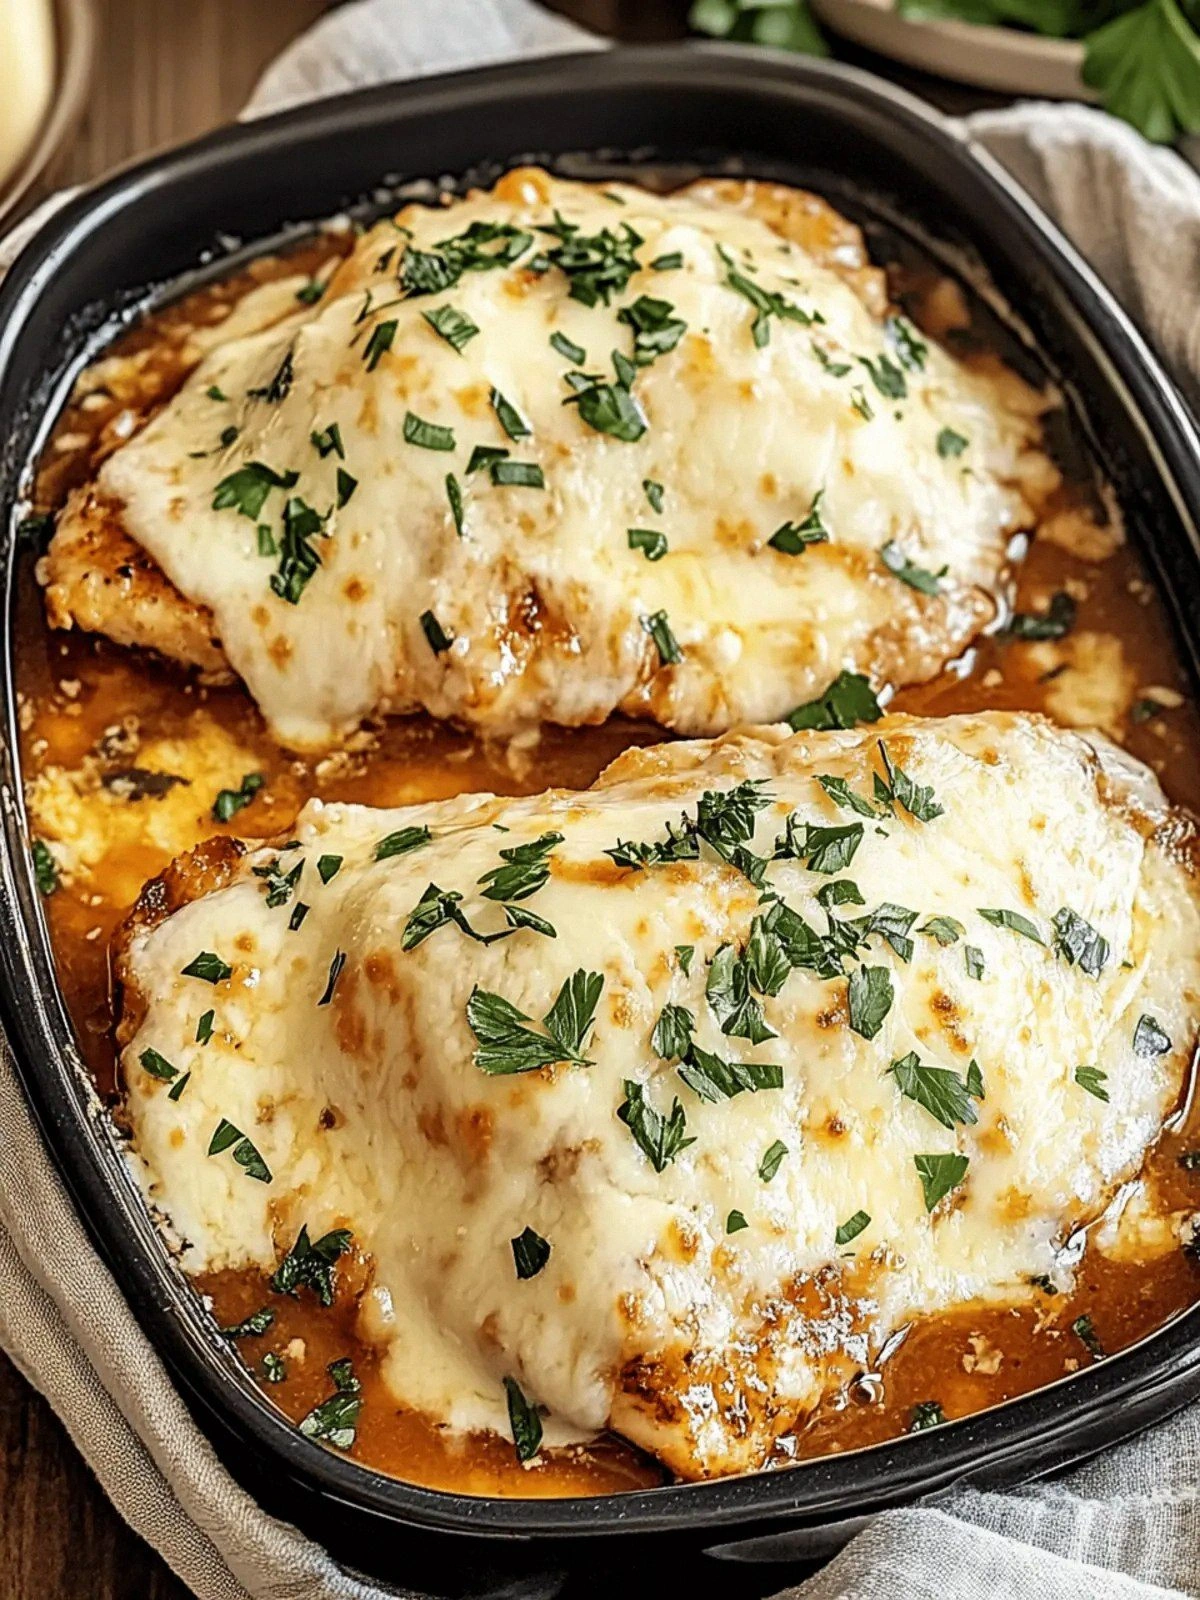
What sets this recipe apart from the countless chicken dishes that flood our kitchens is the flawless marriage of flavor and texture. I’ve taken the classic breaded chicken and elevated it with a cheese‑laden breadcrumb shell that creates an irresistibly crunchy bite. The secret lies in the balance of spices, the double‑dipping technique that locks in moisture, and the final flourish of fresh parsley that adds a pop of color and brightness. Most recipes get this completely wrong, leaving the coating soggy or the chicken dry; here, everything works in perfect harmony. I dare you to taste this and not go back for seconds, because that’s the hallmark of a truly great dish.
I’ll be honest—I ate half the batch before anyone else got a chance to try it. The first bite was a revelation: the crust crackled like thin ice, revealing a juicy interior that practically melted in my mouth. The Romano cheese added a savory depth that turned a simple chicken breast into a gourmet experience, while the lemon wedges provided a bright counterpoint that kept the dish from feeling heavy. This isn’t just another recipe; it’s a culinary experience that will have your friends asking for the recipe after the last bite. Picture yourself pulling this out of the oven, the whole kitchen smelling incredible, and everyone gathering around the table with smiles that say, “I’m glad you’re here.”
Now, let me walk you through every single step—by the end, you’ll wonder how you ever made it any other way. I’m going to share a technique you won’t expect, a spice blend that will elevate your flavor game, and a few kitchen hacks that will save you time and frustration. You’ll learn how to achieve that perfect golden crust without over‑browning, how to keep the chicken moist, and how to plate it like a pro. This is hands down the best version you’ll ever make at home, and I promise it will become a staple in your dinner rotation. So grab a notebook, because we’re about to embark on a flavor adventure that will leave your taste buds dancing.
What Makes This Version Stand Out
- Flavor Depth: The blend of paprika, garlic powder, and black pepper creates a savory base that sings with each bite. The Romano cheese infuses a salty, nutty richness that elevates the entire dish. Together, they form a symphony that lingers on the palate.
- Crisp Texture: A double‑dip in flour, egg wash, and breadcrumb mixture locks in moisture while delivering a crunch that snaps like thin ice. The coating remains crisp even after baking, ensuring a satisfying bite every time. It’s the kind of texture that makes you reach for more.
- Simple Prep: All the ingredients are pantry staples, and the process requires no advanced techniques. The method is straightforward, yet it feels like a professional kitchen trick. You’ll finish in under an hour, no matter how busy your week.
- Crowd Appeal: Whether it’s a family dinner or a dinner party, this dish is guaranteed to impress. The golden crust and cheesy aroma are instant crowd‑pleasers, and the lemon finish adds a refreshing twist that keeps everyone talking.
- Ingredient Quality: Using high‑quality Romano cheese and fresh parsley makes a world of difference. The breadcrumbs are lightly toasted to add depth, and the olive oil is extra‑virgin for a bright finish. Quality ingredients translate to flavor.
- Make‑Ahead Friendly: The coated chicken can be prepped a day ahead, refrigerated, and baked just before serving. This flexibility is ideal for busy schedules, allowing you to focus on other tasks while the dish finishes cooking.
- Nutritional Balance: With 25 grams of protein per serving and a moderate carb and fat profile, this dish satisfies both taste buds and dietary goals. It’s a balanced meal that doesn’t compromise on flavor.
- Versatility: The recipe adapts to various dietary preferences. Swap the breadcrumbs for almond flour for a gluten‑free version, or add a pinch of cayenne for heat. The core concept remains the same, but the possibilities are endless.
Inside the Ingredient List
The Flavor Base
Salt, black pepper, garlic powder, and paprika form the aromatic foundation of this dish. Each spice is measured precisely to create a balanced profile that doesn’t overwhelm the Romano. If you skip any of these, the chicken will taste flat, lacking the punch that makes it memorable. You can replace paprika with smoked paprika for a deeper, smoky undertone, but keep the garlic powder to maintain that classic Italian vibe.
The Texture Crew
All-purpose flour, eggs, milk, and Italian-style breadcrumbs are the backbone of the coating. Flour gives structure to the batter, while the eggs and milk create a wet base that holds the crumbs together. The breadcrumbs, toasted lightly, add crunch and a subtle nutty flavor. If you prefer a gluten-free version, swap the flour for a blend of rice and cornstarch, but keep the egg wash for moisture.
The Unexpected Star
Grated Romano cheese is the star that sets this recipe apart. Its sharp, buttery flavor melts into the coating, creating a savory, melt-in-your-mouth experience. Romano is traditionally made from a blend of cow and sheep milk, giving it a unique depth that regular cheddar can’t match. If you can’t find Romano, a mix of Parmesan and pecorino will work, but the taste will shift slightly.
The Final Flourish
Olive oil, unsalted butter, fresh parsley, and lemon wedges finish the dish with brightness and depth. Olive oil adds a fruity note that balances the richness, while butter gives a glossy sheen. Fresh parsley provides a pop of color and a fresh herbal note that cuts through the heaviness. Lemon wedges add a bright, citrusy zing that lifts the entire dish.
Everything's prepped? Good. Let's get into the real action...
The Method — Step by Step
- Preheat your oven to 425°F (220°C). While the oven warms, set up three shallow bowls: one with flour, one with beaten eggs and milk, and one with a mixture of breadcrumbs and grated Romano. The high temperature ensures a quick, crisp crust. Remember to line a baking sheet with parchment for easy cleanup.
- Season the chicken breasts on both sides with salt, black pepper, garlic powder, and paprika. Pat them dry with paper towels; moisture is the enemy of crispness. The seasoning should coat every inch, creating a flavorful base that permeates the meat.
- Coat each breast by first dredging in flour, shaking off excess, then dipping in the egg wash, and finally rolling in the breadcrumb‑cheese mixture. The double‑dip locks in moisture and ensures a thick, uniform coating. If you want extra crunch, press the crumbs onto the surface firmly.
- Heat olive oil and butter in a large skillet over medium‑high heat until the butter foams and the oil shimmers. Add the chicken breasts, skin side down if applicable, and let them sear for 2–3 minutes per side until golden. The sizzling sound is your cue that the crust is forming.
- Transfer the seared chicken to the prepared baking sheet. Slide them gently so the coating sits flat and can crisp evenly. The oven will finish the cooking while the skillet can be used for a quick sauce if you wish.
- Bake for 15–18 minutes, or until the internal temperature reaches 165°F (74°C). The crust should be golden and firm. The aroma will fill the kitchen, making the waiting feel almost worth the effort.
- Let the chicken rest for 5 minutes off the heat. This step allows the juices to redistribute, ensuring every bite stays moist. While resting, sprinkle chopped parsley and squeeze fresh lemon wedges over the top for a burst of freshness.
- Serve immediately, accompanied by a simple green salad or roasted vegetables. The bright lemon and parsley contrast beautifully with the rich, cheesy crust. Plate it like a pro: arrange the chicken on a warm platter, drizzle a little olive oil, and garnish with extra parsley for a polished look.
That's it — you did it. But hold on, I've got a few more tricks that'll take this to another level...
Insider Tricks for Flawless Results
The Temperature Rule Nobody Follows
Many cooks think a low oven is safer, but a high temperature is the secret to a perfectly crisp coating. Baking at 425°F locks the exterior in minutes while keeping the inside juicy. If you’re using a convection oven, reduce the temperature by 25°F to avoid over‑browning.
Why Your Nose Knows Best
The aroma of sizzling butter and olive oil is a reliable indicator that the coating is forming correctly. If you smell a burnt scent early on, lower the heat. If the smell is faint, increase the heat slightly. Trust your nose; it’s the best judge of doneness.
The 5-Minute Rest That Changes Everything
Resting after baking is often overlooked, but it’s essential for juicy meat. A 5‑minute rest lets the juices redistribute, preventing them from spilling out onto the plate. A friend once skipped this step, and the result was a dry, disappointing chicken.
Double‑Dipping for Extra Crunch
The double‑dip technique (flour, egg, breadcrumb) creates a multi‑layered crust that doesn’t crumble. If you want an even crunchier texture, press the breadcrumb mixture onto the chicken firmly after the egg wash. This ensures the crumbs stick and form a solid shell.
The Right Oil Mix
Using a blend of olive oil and butter gives a richer flavor while preventing the coating from burning. Olive oil’s high smoke point keeps the butter from scorching. If you’re looking for a lower‑fat version, replace half the butter with a light cooking spray.
Plating Like a Pro
A simple, elegant presentation can elevate any dish. Arrange the chicken on a warm platter, drizzle a small amount of olive oil, and scatter fresh parsley. Add a lemon wedge on the side for a pop of color and a hint of citrus aroma.
Creative Twists and Variations
This recipe is a playground. Here are some of my favorite ways to switch things up:
Spicy Southwest
Swap the paprika for a smoky chipotle powder and add a dash of cayenne for heat. Toss the coated chicken in a cilantro‑lime salsa after baking for a fresh, zesty finish. This variation brings a southwestern flair that pairs well with corn tortillas.
Mediterranean Zest
Replace the breadcrumbs with panko for extra crunch, and sprinkle dried oregano over the coating. Finish with a drizzle of lemon‑yogurt sauce and a handful of Kalamata olives. The result is a Mediterranean‑inspired dish that’s both bright and savory.
Herb‑Infused Parmesan
Add chopped rosemary and thyme to the breadcrumb mixture for an aromatic crust. Replace Romano with a blend of Parmesan and Pecorino for a milder cheese flavor. This version is perfect for a cozy dinner with a touch of herbal elegance.
Coconut‑Crispy
Use shredded coconut in place of breadcrumbs for a tropical twist. Lightly toast the coconut to bring out its nutty flavor. Pair with a mango salsa for a sweet‑spicy contrast that feels like a beach vacation.
Cheesy Gouda Upgrade
Swap Romano for smoked Gouda to add a smoky depth. Mix the cheese with a touch of grated Parmesan for a complex flavor profile. This upgrade is ideal for a hearty, comforting meal.
Pesto‑Piled
After baking, drizzle basil pesto over the chicken. The fresh herbs and garlic in the pesto complement the crunchy coating perfectly. Serve with a side of roasted potatoes for a complete Italian-inspired plate.
Storing and Bringing It Back to Life
Fridge Storage
Cool the cooked chicken to room temperature before refrigerating in an airtight container. It will stay fresh for up to 4 days. When ready to reheat, use a skillet to maintain the crispness, or reheat in the oven at 350°F for 10 minutes.
Freezer Friendly
Wrap each chicken breast individually in parchment paper and place them in a freezer bag. Freeze for up to 3 months. When thawing, let the chicken sit at room temperature for 30 minutes before reheating.
Best Reheating Method
To revive the crispness, add a splash of water to the skillet, cover, and heat until steaming. This steams the chicken back to life without drying it out. Finish with a quick sear in hot oil for a fresh crunch.