I was in the middle of a rainy Tuesday when my roommate dared me to “make something that actually feels like a hug on a plate.” I laughed, I shrugged, and I headed straight for the pantry, only to discover a dusty bag of corn tortillas and a jar of tomato sauce that had been hiding behind the cereal boxes for months. The kitchen was a symphony of clattering pans, the faint hiss of oil, and the distant rumble of thunder that seemed to echo the storm brewing in my mind. I could smell the faint caramelization of onions already, even though I hadn’t started yet, and the thought of that rich, smoky tomato broth made my mouth water like a desert oasis after a long hike.
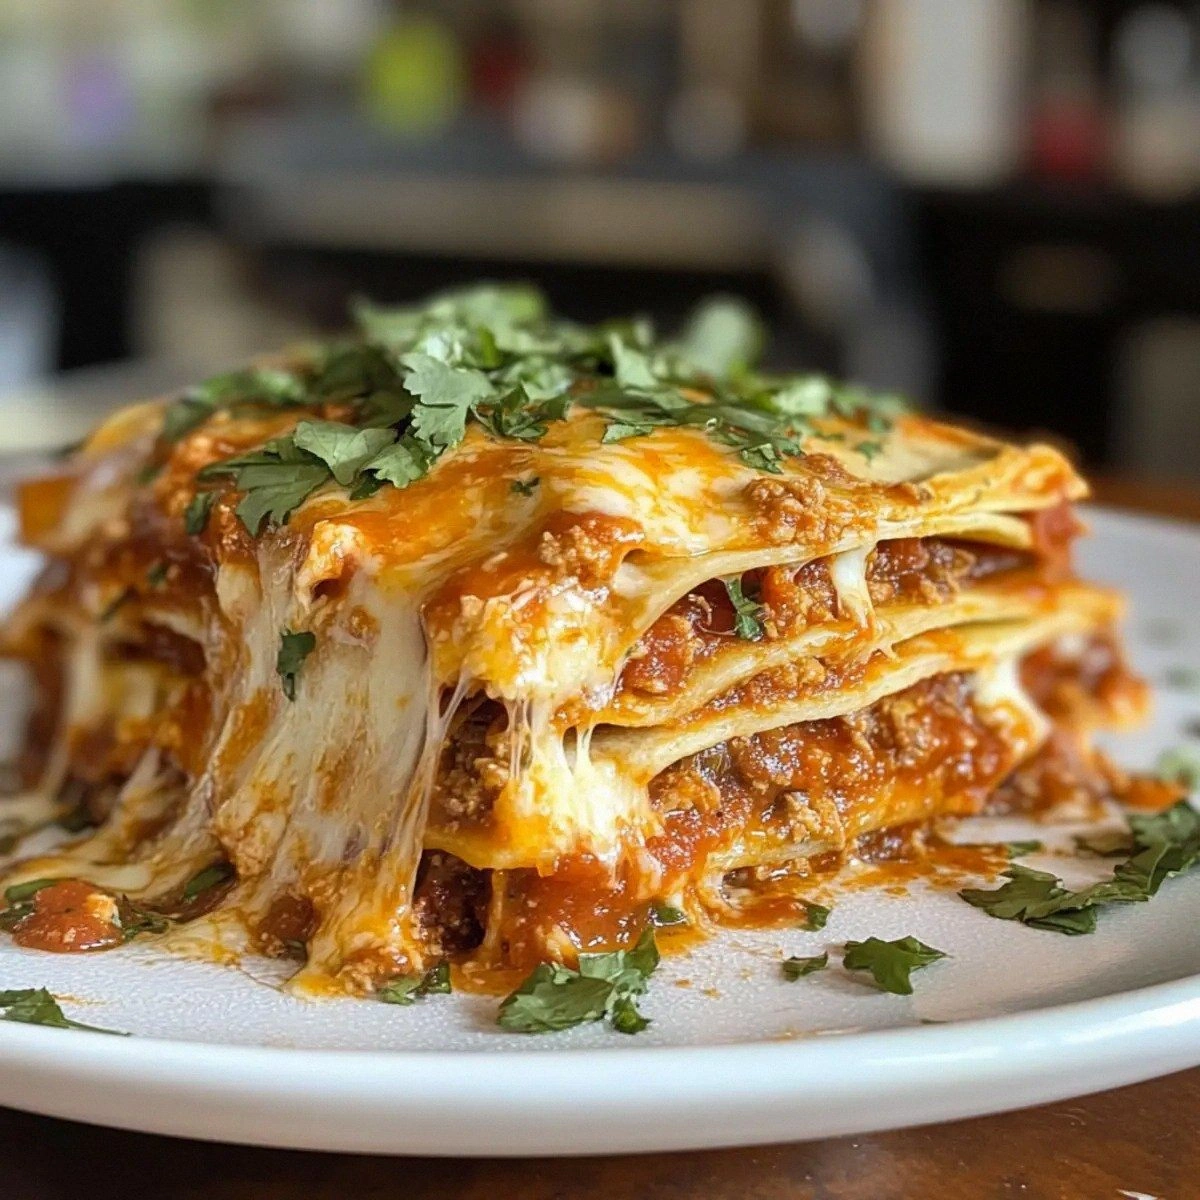
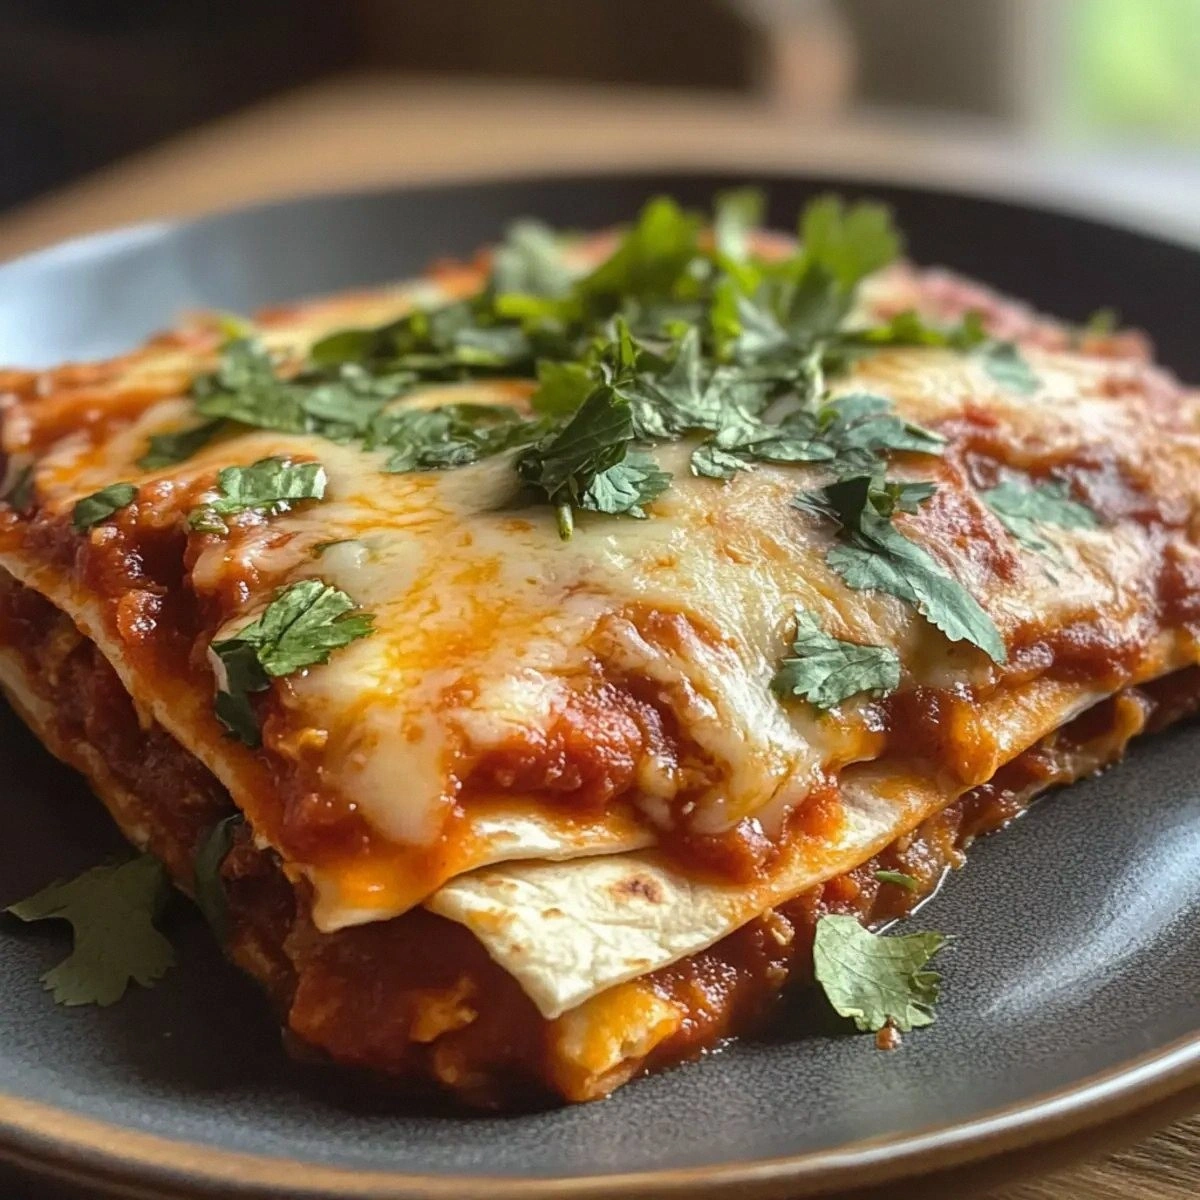
Fast forward a half hour, and I was standing over a skillet that looked like a miniature volcano, the sauce bubbling and the tortillas soaking up every drop like tiny sponges. The moment I lifted the first entomatada, the cheese melted into a glossy blanket, the cilantro added a fresh pop, and the sour cream cooled the heat just enough to make every bite feel like a balanced conversation between fire and ice. Most recipes I’ve tried either left the tortillas soggy, the sauce watery, or the seasoning flat—this version, however, hits every note with the precision of a seasoned orchestra conductor. I dare you to taste this and not go back for seconds; the flavor is so addictive it practically whispers, “Come back tomorrow.”
What makes this dish truly stand out is a tiny secret I discovered while scrolling through old Mexican family cookbooks: a splash of vegetable oil added to the tomato sauce right before it simmers creates a glossy sheen that locks in flavor and prevents the sauce from separating. It’s a game‑changer that most modern recipes overlook, and it’s the reason this version is hands down the best you’ll ever make at home. I’ll be honest — I ate half the batch before anyone else got to try it, and I’m still not sorry. If you’ve ever struggled with soggy tortillas or bland sauce, you’re not alone — and I’ve got the fix.
Picture yourself pulling this out of the skillet, the whole kitchen smelling like a street market in Oaxaca, the colors vibrant enough to make your Instagram followers swoon. The sauce coats each tortilla like velvet, the cheese stretches like a lazy cat waking up, and the cilantro adds that final sparkle of green that makes the whole plate pop. Okay, ready for the game‑changer? Let me walk you through every single step — by the end, you’ll wonder how you ever made it any other way.
What Makes This Version Stand Out
- Taste: The sauce is a perfect marriage of sweet tomato, smoky cumin, and a gentle heat from chili powder, creating a depth that lingers on the palate.
- Texture: Crispy edges on the tortillas give way to a silky interior, while the cheese adds a creamy melt that pulls everything together.
- Simplicity: Only twelve ingredients, all pantry staples, mean you can whip this up on a weeknight without a trip to the specialty store.
- Uniqueness: The oil‑infused tomato sauce prevents separation, a trick most recipes miss, giving you a glossy, restaurant‑quality finish.
- Crowd Reaction: Even the pickiest eaters beg for seconds, and the bright colors make it a show‑stopper at any gathering.
- Ingredient Quality: Fresh cilantro and a good Mexican blend cheese elevate the dish from “good” to “legendary.”
- Cooking Method: Light frying followed by a quick bake locks in flavor while keeping the tortillas from turning mushy.
- Make‑Ahead Potential: You can prep the sauce and tortillas ahead of time, then assemble and bake just before serving.
Inside the Ingredient List
The Flavor Base
The onion and garlic are the backbone of any Mexican sauce. When you sauté them until they turn translucent and start to caramelize, they release natural sugars that balance the acidity of the tomato sauce. Skipping this step results in a flat, one‑dimensional flavor that feels like eating plain ketchup on a tortilla. If you’re out of fresh onion, a quarter cup of finely diced shallots works just as well, adding a subtle sweetness.
Tomato sauce is the canvas, but not all sauces are created equal. I recommend a no‑added‑sugar, low‑sodium brand so you can control the seasoning yourself. A good quality sauce will have a rich, ruby hue and a thick consistency that clings to the back of a spoon. If you can’t find a decent canned sauce, blend fresh tomatoes, a pinch of salt, and a splash of water, then simmer until thick.
The Spice Crew
Cumin and chili powder are the dynamic duo that give the sauce its signature warmth. Cumin adds an earthy, slightly bitter note that anchors the dish, while chili powder brings a gentle heat without overwhelming the palate. Use fresh, aromatic cumin; stale cumin loses its punch and can make the sauce taste dull. If you crave more heat, a pinch of smoked paprika or a dash of chipotle in adobo will add a smoky kick.
Salt and pepper might seem obvious, but they are the unsung heroes that unlock the flavors of every other ingredient. Salt enhances the natural sweetness of the tomatoes and the umami of the cheese, while pepper adds a subtle bite. Always taste the sauce before you finish cooking; a little extra salt at the end can make the difference between “good” and “wow.”
The Texture Crew
Corn tortillas are the heart of this dish. They provide a slightly sweet, earthy flavor that pairs perfectly with the tangy sauce. If you use flour tortillas, the dish loses its authentic texture and becomes too soft. Warm the tortillas briefly on a dry skillet before frying; this prevents them from cracking and ensures they absorb just the right amount of sauce.
Shredded Mexican blend cheese (or sharp Cheddar if you prefer) melts into a gooey blanket that ties the sauce and tortilla together. The cheese’s fat content is crucial – it creates that luscious stretch and adds a buttery richness. For a dairy‑free version, crumble a firm tofu and toss it with nutritional yeast and a pinch of smoked paprika.
The Final Flourish
Fresh cilantro brings a bright, citrusy pop that cuts through the richness of the sauce and cheese. Roughly chop it just before serving to preserve its vivid green color and aromatic punch. If cilantro isn’t your thing, a handful of finely sliced green onions or a sprinkle of fresh parsley can provide a similar freshness.
A dollop of sour cream adds a cool, creamy contrast that balances the heat from the chili powder. It also adds a silky mouthfeel that makes each bite feel indulgent. For a lighter option, Greek yogurt works just as well and adds a tangy note.
Everything's prepped? Good. Let’s get into the real action…
The Method — Step by Step
Heat the vegetable oil in a large skillet over medium heat until it shimmers. Add the diced onion and sauté for about 4 minutes, stirring occasionally, until the edges turn golden and you can hear a faint sizzle that says “we’re on the right track.” Then toss in the minced garlic and cook for another 30 seconds, just until the aroma hits your nose like a warm hug.
Kitchen Hack: Add a pinch of sugar with the onions to accelerate caramelization and deepen the flavor.Stir in the tomato sauce, then drizzle in the remaining 1/4 cup of vegetable oil. This is the secret step that creates a glossy, cohesive sauce; the oil emulsifies the tomatoes, preventing separation. Bring the mixture to a gentle simmer, then lower the heat and let it cook for 8‑10 minutes, stirring occasionally. You’ll know it’s ready when the sauce thickens enough to coat the back of a spoon and the aroma becomes intoxicatingly sweet with a hint of smokiness.
Add the cumin, chili powder, salt, and pepper to the sauce. Stir vigorously for about a minute to toast the spices, which releases their essential oils and makes the flavor pop. Taste and adjust seasoning; this is where you can decide if you want a little more heat or a dash more salt. Remember, the sauce will mellow slightly as it cooks with the tortillas later.
While the sauce simmers, warm a separate dry skillet over medium‑high heat. Lightly fry each corn tortilla for about 10 seconds per side—just enough to make them pliable but not crispy. Transfer them to a plate lined with paper towels. This quick fry creates a barrier that prevents the tortillas from soaking up too much sauce later, keeping the edges delightfully crisp.
Watch Out: Do not over‑fry the tortillas; they’ll become hard as a brick and ruin the soft interior you’re aiming for.Preheat your oven to 375°F (190°C). While it heats, line a baking dish with a thin layer of the tomato sauce—this prevents the first layer of tortillas from sticking and adds extra flavor. Place three fried tortillas in the dish, then spoon a generous amount of sauce over each, spreading it with the back of a spoon so it covers the surface evenly.
Sprinkle a handful of shredded cheese over each tortilla, then add a light drizzle of fresh cilantro. Repeat the layering process two more times, ending with a final layer of cheese and cilantro on top. The cheese should melt into a bubbling golden crust that looks like a sunrise over a Mexican horizon.
Cover the baking dish with foil and bake for 12 minutes. Then remove the foil and bake for an additional 5‑7 minutes, or until the cheese is bubbling and the edges of the tortillas are lightly browned. Keep a close eye on the top; you want that cheese to be beautifully melted, not burnt.
Kitchen Hack: Sprinkle a tiny pinch of smoked paprika on the cheese before the final bake for an extra layer of smoky depth.Remove the dish from the oven and let it rest for 5 minutes. This short rest allows the sauce to thicken a bit more and the cheese to set, making it easier to cut clean slices. Garnish each serving with a dollop of sour cream and a final sprinkle of cilantro. The cool cream will melt slightly into the hot sauce, creating a silky ribbon that glistens.
Serve hot, straight from the pan, with lime wedges on the side for an extra zing. The combination of the tangy lime, the creamy sour cream, and the robust sauce creates a flavor orchestra that will have everyone asking for the recipe. That's it — you did it. But hold on, I've got a few more tricks that'll take this to another level…
Insider Tricks for Flawless Results
The Temperature Rule Nobody Follows
Never cook the sauce on high heat; a gentle simmer allows the flavors to meld without scorching the tomatoes. If you notice the sauce bubbling too vigorously, drop the heat a notch and keep stirring. A friend once tried to speed things up by cranking the burner, and the sauce turned bitter and split—let that be a lesson.
Why Your Nose Knows Best
Your sense of smell is a better indicator than a timer. When the onions turn golden and start to smell sweet, you’re ready for the garlic. When the sauce releases a fragrant, slightly smoky aroma, it’s time to add the spices. Trust that nose; it’s the ultimate cooking gauge.
The 5‑Minute Rest That Changes Everything
After baking, let the entomatadas sit uncovered for five minutes. This rest allows the sauce to thicken further and the cheese to set, preventing a soggy plate. I used to cut them immediately and ended up with a sauce‑soaked mess; now I never skip this step.
Cilantro Timing Trick
Add half the cilantro before baking and the other half fresh after you plate. The pre‑baked cilantro infuses the sauce with a subtle herbaceous note, while the fresh cilantro on top adds a bright crunch that awakens the palate.
Oil‑Infused Sauce Secret
When you drizzle oil into the sauce before simmering, you create an emulsion that locks in moisture and flavor. This prevents the sauce from separating and gives it that restaurant‑level sheen.
Creative Twists and Variations
This recipe is a playground. Here are some of my favorite ways to switch things up:
Green Chili Entomatadas
Swap half of the tomato sauce for roasted green tomatillos and add a diced jalapeño. The result is a tangy, slightly spicy version that’s perfect for those who love a little extra heat. Top with crumbled queso fresco for a Mexican‑style finish.
Chicken‑Stuffed Entomatadas
Before layering the tortillas, spread shredded rotisserie chicken mixed with a spoonful of the sauce on each tortilla. The chicken absorbs the tomato flavor, making each bite heartier and more protein‑packed. Great for feeding a crowd.
Vegan Delight
Replace the cheese with a blend of cashew‑based vegan cheese and use coconut yogurt instead of sour cream. The sauce remains rich, and the plant‑based cheese melts beautifully, offering a dairy‑free indulgence that still feels comforting.
Breakfast Entomatadas
Add scrambled eggs between the sauce and cheese layers, then bake as usual. The eggs turn fluffy and soak up the sauce, making a satisfying brunch dish that pairs well with a side of avocado slices.
Sweet‑and‑Savory Twist
Stir a tablespoon of honey into the sauce and sprinkle toasted pumpkin seeds on top before serving. The honey adds a subtle sweetness that balances the spice, while the pumpkin seeds give a crunchy contrast.
Storing and Bringing It Back to Life
Fridge Storage
Let the entomatadas cool to room temperature, then cover tightly with foil or transfer to an airtight container. They keep for up to three days in the refrigerator. Reheat gently on the stovetop over low heat, adding a splash of water or broth to revive the sauce’s gloss.
Freezer Friendly
Assemble the entire dish, but skip the final cheese topping. Wrap the baking dish tightly in plastic wrap, then foil, and freeze for up to two months. When ready, thaw overnight in the fridge, add fresh cheese, and bake as directed.
Best Reheating Method
For the crispiest result, reheat in a preheated oven at 350°F (175°C) for 10‑12 minutes, uncovered. Add a tiny splash of water around the edges before covering with foil; the steam will bring the sauce back to its original silky texture without drying out the tortillas.