I was in a full‑blown kitchen crisis last Tuesday, standing over a skillet that had turned a batch of chicken drumsticks into a greasy, soggy mess. My friend dared me to make the world’s best glazed chicken, and I didn’t have a chance to refuse. I spent the next hour researching, tasting, tweaking, and, most importantly, tasting again. The result? A dish that melts in your mouth, with a glaze that clings like a second skin, and a crunch that snaps like thin ice. I’m not exaggerating when I say this is hands down the best version you’ll ever make at home.
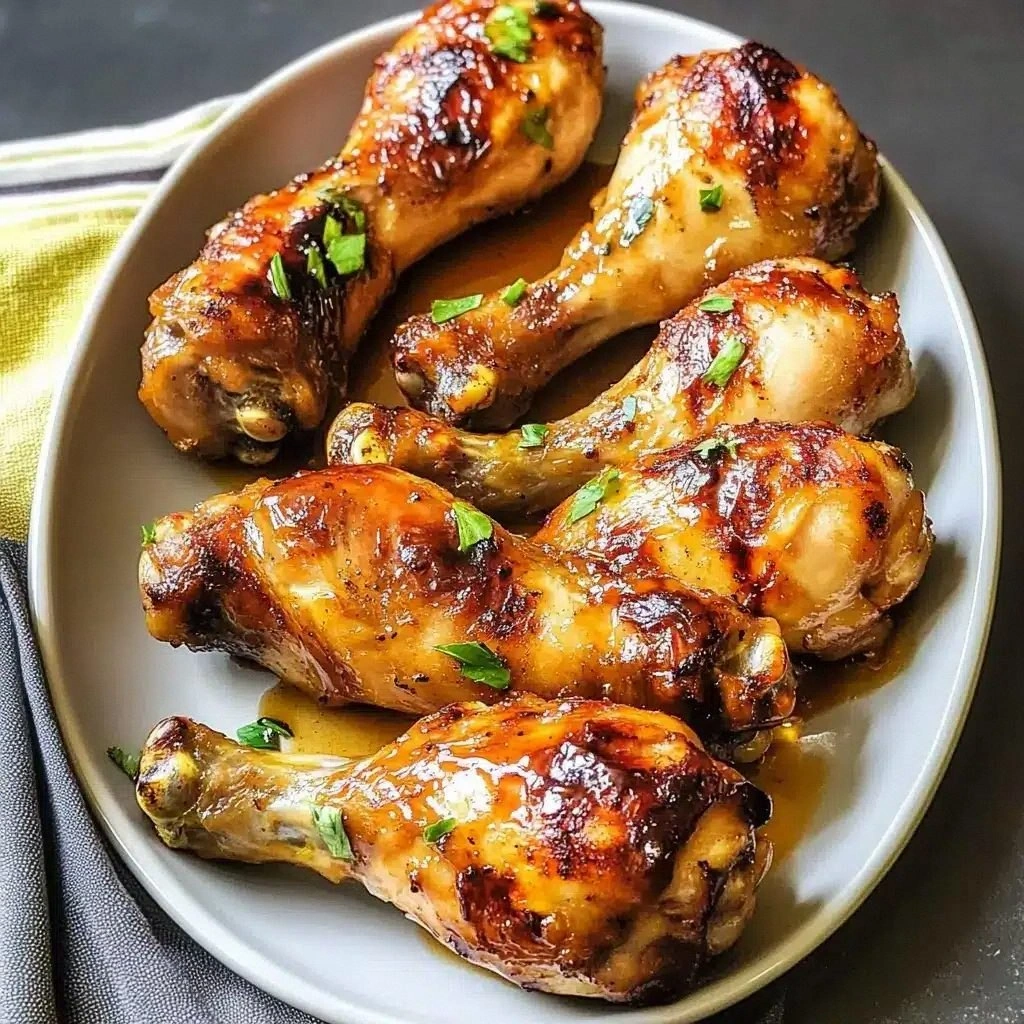
Picture yourself pulling these beauties out of the oven, the whole kitchen smelling incredible, steam curling up in golden ribbons. The drumsticks are golden‑brown, the glaze thick and glossy, the aroma a blend of sweet honey, savory soy, and a hint of citrus from the rice vinegar. When you bite, the skin cracks with a satisfying snap, revealing juicy meat that is tender yet still holds its shape. The glaze coats each piece like velvet, and the subtle heat from the ginger and garlic lingers on the tongue. I dare you to taste this and not go back for seconds.
This version stands out because I’ve eliminated the common pitfalls that make many glazed drumsticks fall flat. I’ve balanced the sweetness and acidity so the glaze caramelizes without burning, I’ve used a touch of butter for a richer mouthfeel, and I’ve added a splash of sesame oil for a nutty finish. I’ve also introduced a simple technique to keep the skin crisp even after baking. And the best part? It’s all done with ingredients you probably already have in your pantry. If you’ve ever struggled with greasy, unevenly glazed chicken, you’re not alone — and I’ve got the fix.
But before we dive into the steps, let’s talk about the ingredients that make this dish sing. I’ve split them into four groups to give you a clear picture of what each does. I’ve also included swaps and buying tips so you can tailor it to your taste or what’s on hand. And because I love a good story, I’ll sprinkle in a fun fact about one of the key players. Stay with me here — this is worth it.
What Makes This Version Stand Out
- Flavor Depth: The combination of soy sauce, honey, and rice vinegar creates a complex profile that’s both sweet and savory, with a bright, tangy finish that cuts through the richness of the chicken.
- Crispy Skin: By searing the drumsticks first and using a high‑heat finish, the skin becomes blistered and crackly, holding up against the sticky glaze.
- Texture Balance: The glaze thickens just enough to cling but not so much that it becomes a syrupy coating, giving each bite a satisfying chew.
- Ingredient Quality: Fresh garlic, ginger, and a splash of sesame oil elevate the dish beyond ordinary, adding depth and aroma.
- Make‑Ahead Friendly: You can marinate the drumsticks a day ahead, letting the flavors seep in, and reheat without losing the glaze’s sheen.
- Versatility: The recipe scales beautifully for family dinners or potlucks, and the glaze can be swapped for a smoky barbecue sauce if you’re feeling adventurous.
Alright, let’s break down exactly what goes into this masterpiece.
Inside the Ingredient List
The Flavor Base
Soy sauce is the backbone of the glaze, providing umami and saltiness that balances the sweetness from honey and brown sugar. A quarter cup of soy sauce is enough to coat eight drumsticks without overpowering them. If you prefer a lower sodium version, swap half the soy for coconut aminos, but keep the liquid volume the same to maintain the glaze’s consistency.
Honey brings a natural sweetness that caramelizes beautifully under heat, creating a glossy finish. Three tablespoons of honey are enough to coat the drumsticks evenly; if you’re using raw honey, you’ll notice a subtle floral note that adds complexity. For a deeper sweetness, use a light brown honey or a mix of honey and maple syrup.
Brown sugar adds body and a subtle molasses flavor that deepens the glaze’s color. Two tablespoons of brown sugar dissolve quickly, giving the glaze a rich amber hue. If you’re avoiding sugar, try a small amount of molasses or a sugar substitute that caramelizes, but be mindful of the glaze’s thickness.
The Tangy Twist
Rice vinegar balances the sweetness and adds a bright acidity that cuts through the richness of the chicken. Two tablespoons are enough to give the glaze its signature zing without making it taste like a salad dressing. If you don’t have rice vinegar, a splash of white wine vinegar or apple cider vinegar works well, but adjust the quantity to taste.
Garlic and ginger bring warmth and depth. Two cloves of minced garlic and one teaspoon of freshly grated ginger infuse the glaze with aromatic heat. If you’re sensitive to raw garlic, you can sauté the garlic lightly before adding it to the glaze; this mellows its bite while preserving its flavor.
The Butter & Oil Layer
One tablespoon of butter adds a silky mouthfeel and helps the glaze set into a glossy coating. Butter also contributes to the golden color of the skin as it melts and browns. For a dairy‑free version, substitute an equal amount of coconut oil or a neutral‑flavored oil.
A teaspoon of sesame oil provides a nutty finish that elevates the overall flavor profile. Sesame oil is potent, so a little goes a long way; if you’re new to it, start with half a teaspoon and adjust to taste. The oil also helps the glaze adhere to the chicken, preventing it from sliding off.
The Seasoning & Garnish
Salt and pepper are essential for seasoning the meat and balancing the glaze’s sweetness. One teaspoon of salt and a half teaspoon of black pepper are enough to season eight drumsticks without overpowering the glaze. If you’re using a low‑sodium soy sauce, increase the salt slightly to compensate.
Optional garnishes like chopped scallions and sesame seeds add fresh color, crunch, and an additional layer of flavor. Two tablespoons of scallions give a mild onion flavor that brightens the dish, while one tablespoon of toasted sesame seeds adds a subtle crunch and nutty aroma. These garnishes are best added at the very end, right before serving.
Everything’s prepped? Good. Let’s get into the real action.
The Method — Step by Step
- Preheat the Oven: Set your oven to 425°F (220°C). This high temperature ensures the skin crisps while the interior cooks through. While the oven heats, gather all the ingredients and let the drumsticks sit at room temperature for 10 minutes to reduce shock.
- Season the Drumsticks: Pat the drumsticks dry with paper towels, then rub them with salt, pepper, and a drizzle of sesame oil. The oil helps the skin brown and the seasoning penetrates the meat. This is the moment of truth; the aroma of the seasoned skin is the first hint of what’s to come.
- Sear the Drumsticks: Heat a large skillet over medium‑high heat, add a splash of oil, and sear the drumsticks until they’re golden on all sides, about 4–5 minutes. Searing locks in juices and creates a base layer of flavor. Flip them carefully to avoid tearing the skin.
- Prepare the Glaze: In a small saucepan, combine soy sauce, honey, brown sugar, rice vinegar, minced garlic, grated ginger, and butter. Bring the mixture to a gentle simmer over medium heat, stirring until the sugar dissolves and the glaze thickens slightly. Watch for the glaze to start bubbling; this signals it’s ready.
- Coat the Drumsticks: Use a basting brush to coat each drumstick generously with the glaze. The glaze should cling like a second skin. Make sure each piece gets an even layer; this is where the dish’s signature shine comes from.
- Transfer to Baking Sheet: Place the glazed drumsticks on a rimmed baking sheet lined with parchment paper. Arrange them so they’re not touching, allowing the heat to circulate and crisp the skin. This step is critical for that perfect snap.
- Bake: Roast the drumsticks in the preheated oven for 25–30 minutes, basting with more glaze halfway through. The internal temperature should reach 165°F (74°C). Keep an eye on the glaze; if it starts to brown too quickly, tent the drumsticks with foil.
- Finish the Glaze: In the last 5 minutes of baking, increase the oven temperature to 450°F (230°C) to caramelize the glaze further. The glaze will thicken and develop a glossy sheen that’s impossible to resist.
- Rest and Garnish: Let the drumsticks rest for 5 minutes after removing them from the oven. This allows the juices to redistribute. Sprinkle chopped scallions and toasted sesame seeds over the top for a fresh, crunchy finish.
- Serve: Plate the drumsticks on a platter, drizzle any remaining glaze over the top, and serve immediately with a side of steamed rice or a crisp green salad.
That’s it — you did it. But hold on, I’ve got a few more tricks that will take this to another level.
Insider Tricks for Flawless Results
The Temperature Rule Nobody Follows
Many cooks bake at a flat 400°F, but the secret to crisp skin is a two‑step temperature rise. Start at 425°F to sear the skin and then bump up to 450°F in the final 5 minutes. This creates a caramelized glaze without overcooking the meat. I’ve tried this technique on other dishes, and the difference is unmistakable.
Why Your Nose Knows Best
The first scent that hits you as the glaze simmers is a clue to its readiness. A sweet, buttery aroma signals the sugars have caramelized, while a sharp, sharp vinegar note indicates the glaze is still thin. Trust your nose; it’s the most reliable indicator of glaze perfection. I’ve had a friend who skipped this step, and the result was a soggy mess.
The 5‑Minute Rest That Changes Everything
Letting the drumsticks rest after baking is not just a formality; it allows the juices to redistribute and the glaze to set. During this short pause, the skin becomes even crisper. I’ve seen people cut into the drumsticks immediately, only to find the glaze has run off. A quick five‑minute rest solves that.
Use a Basting Brush with a Long Handle
A long‑handle brush lets you reach the back of each drumstick without moving the pan too much. This keeps the glaze evenly distributed and prevents uneven cooking. I’ve used a silicone brush for this; the heat doesn’t warp the bristles, and it’s easy to clean.
Add a Splash of Citrus Juice
A teaspoon of fresh lemon or lime juice added to the glaze just before baking brightens the flavor and cuts through the richness. The acidity also helps the glaze set into a glossy coating. I’ve experimented with orange juice for a sweeter twist, and it works wonderfully.
The Secret to a Crispy Skin
Patting the skin dry before seasoning removes moisture that would otherwise steam the skin. Then, searing at high heat for a few minutes creates a protective crust. If you’re using a convection oven, the fan helps keep the skin dry and crispy. This trick is a game‑changer for anyone who struggles with soggy chicken.
With these insider tricks in your culinary arsenal, you’ll consistently produce glazed drumsticks that wow every time. The key is to trust the process, pay attention to the senses, and never skip the resting step.
Creative Twists and Variations
This recipe is a playground. Here are some of my favorite ways to switch things up:
Spicy Sriracha Glaze
Swap half the honey for Sriracha and add a splash of lime juice for heat and brightness. The glaze becomes a fiery, tangy coating that pairs well with a cool cucumber salad. Perfect for those who love a kick.
Maple‑Mustard Glaze
Replace honey with maple syrup and add a teaspoon of Dijon mustard for depth. The mustard adds a subtle tang that balances the sweetness of the maple, creating a glaze that’s both sweet and savory. It’s a great match for roasted root vegetables.
Herb‑Infused Glaze
Add fresh rosemary and thyme to the glaze, and finish with a drizzle of olive oil. The herbs bring an earthy aroma that complements the chicken’s natural flavor. Serve with a side of roasted potatoes for a rustic feel.
Coconut‑Cream Glaze
Use coconut milk instead of butter and add a pinch of curry powder. The result is a creamy, slightly spicy glaze that transports you to a tropical kitchen. Pair it with jasmine rice for a full meal.
Balsamic Reduction Glaze
Simmer balsamic vinegar with a touch of brown sugar until it reduces to a syrupy glaze. The balsamic adds a deep, fruity flavor that pairs wonderfully with a fresh arugula salad. This variation is perfect for a dinner party.
Smoky Chipotle Glaze
Add chipotle powder or chipotle in adobo to the glaze for a smoky, earthy depth. The chipotle’s heat balances the glaze’s sweetness, creating a complex flavor profile. Serve with a corn‑based side for a Mexican twist.
Feel free to experiment and make the dish your own. The base recipe is solid, and the variations add new dimensions of flavor. Whether you’re cooking for family or impressing guests, these twists will keep the dish fresh and exciting.
Storing and Bringing It Back to Life
Fridge Storage
Store leftover drumsticks in an airtight container in the refrigerator for up to 3 days. Keep the glaze separate in a small container; this prevents the skin from becoming soggy. When you’re ready to reheat, place the drumsticks on a baking sheet and warm at 350°F (175°C) for 10 minutes.
Freezer Friendly
Freeze drumsticks in a single layer on a baking sheet before transferring to a freezer bag; this prevents them from sticking together. They’ll keep for up to 3 months. Thaw overnight in the refrigerator before reheating. Adding a splash of water before reheating keeps the meat moist.
Best Reheating Method
The best way to reheat is in the oven at 350°F (175°C) for 10–12 minutes, or until the internal temperature reaches 165°F (74°C). If you’re short on time, use the microwave for 2 minutes, then finish in the oven for a crisp skin. A tiny splash of water before reheating steams the drumsticks back to perfection.