Picture this: I’m standing in my kitchen, the timer’s beeping, my apron a little too tight, and a box of plain peanut butter cookies sitting on the counter. I’ve tried the classic recipe a dozen times—flaky, dry, and as bland as a gray Monday morning. The moment the oven timer goes off and the smell of toasted butter fills the air, I realize I’m about to unleash a flavor explosion that will make even the most skeptical of friends swoon. I dare you to taste this and not go back for seconds. I’m about to show you why this peanut butter candy bar cookie isn’t just another cookie; it’s the best version you’ll ever make at home.
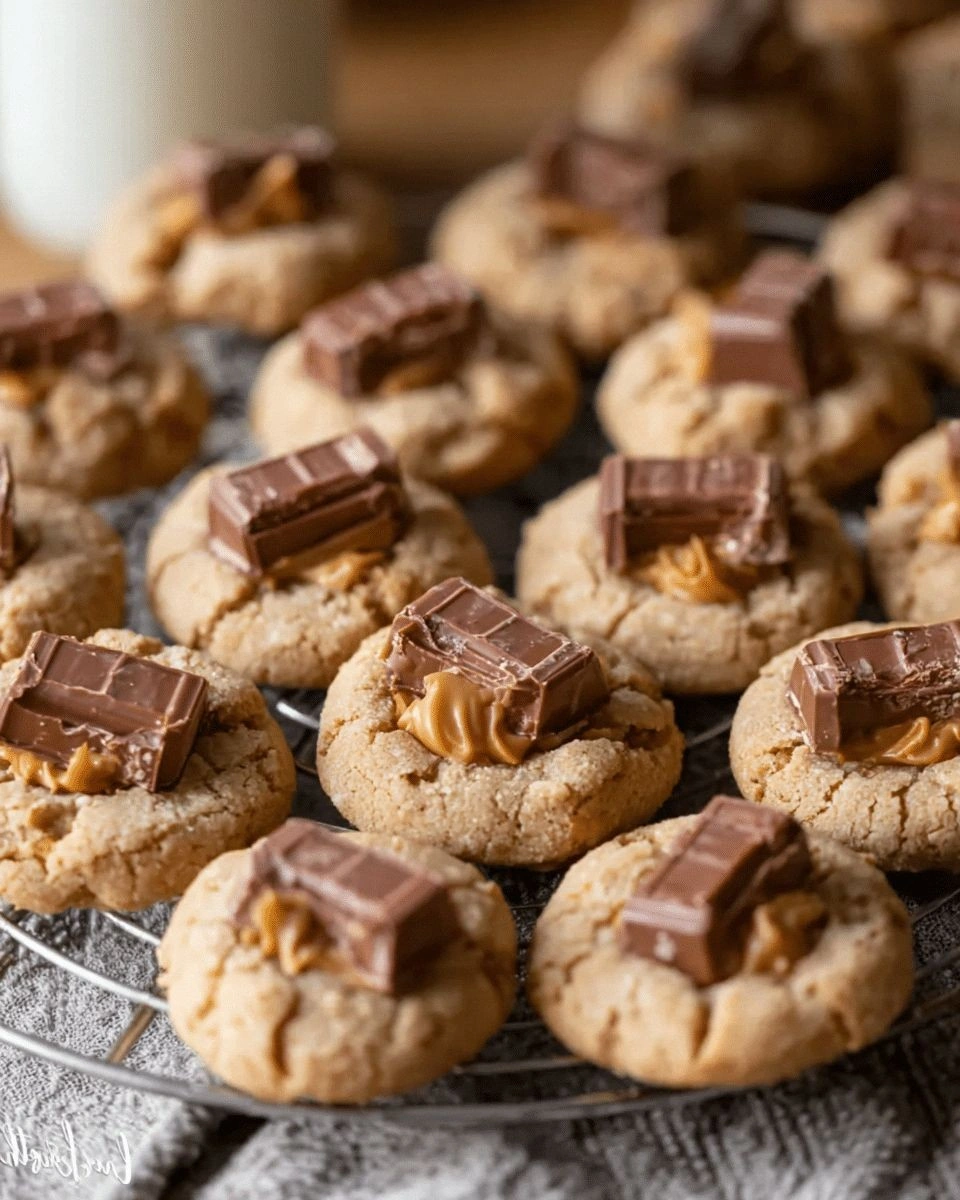
The first bite is a buttery, slightly sweet base that melts in your mouth, followed by a rich, velvety peanut butter center that’s as creamy as a cloud. Then comes the crunch: candy bar pieces that pop like tiny fireworks, releasing molten chocolate that coats every crumb. The texture is a masterful dance—soft edges, a slightly crisp rim, and a chewy, chocolatey middle that lingers. Every bite feels like a nostalgic hug from your childhood, but with a modern twist that makes it feel brand new. If you’ve ever struggled with bland peanut butter cookies, you’re not alone—and I’ve got the fix. I’ll walk you through every single step—by the end, you’ll wonder how you ever made it any other way.
What if I told you that the secret to these cookies lies in a few clever tweaks and a sprinkle of audacity? The moment you crack open the tin, you’ll hear the crunch that tells you you’re about to taste something extraordinary. The aroma of toasted butter and chocolate mingles, creating a heady scent that will make your whole kitchen smell incredible. Picture yourself pulling this out of the oven, the whole kitchen smelling incredible, and the anticipation of that first bite. I’ve spent months tweaking this recipe, and the result is a cookie that’s not just delicious but unforgettable. Ready for the game-changer? Let’s dive into the details.
What Makes This Version Stand Out
- Flavor Depth: The combination of creamy peanut butter, chocolate candy bars, and a hint of vanilla creates a layered taste profile that’s both nostalgic and sophisticated. Each bite delivers a burst of sweetness followed by a subtle nutty finish.
- Texture Contrast: The cookies feature a soft, chewy center with a crisp, slightly caramelized edge that shatters like thin ice when you bite into them. This duality keeps the palate engaged.
- Simplicity: Despite the complex flavor, the recipe uses only a handful of pantry staples—no obscure ingredients or special equipment required.
- Make‑Ahead Friendly: You can bake a batch, cool them completely, and store them in an airtight container for up to a week. They’re even better the next day when the flavors have had time to meld.
- Visual Appeal: The glossy chocolate chunks embedded in the dough make for an Instagram‑worthy cookie that looks as good as it tastes.
- Crowd‑Pleaser: At parties or potlucks, these cookies are guaranteed to vanish faster than any other dessert on the table.
- Ingredient Quality: Using a high‑quality peanut butter and premium chocolate bars elevates the flavor, making each bite feel indulgent.
- Versatility: The recipe can be tweaked with different chocolate types or nut butters to suit any palate.
Alright, let's break down exactly what goes into this masterpiece…
Inside the Ingredient List
The Flour Foundation
All-purpose flour is the backbone of these cookies, providing structure and a slightly crisp crust. It’s the silent hero that holds the peanut butter and chocolate together. If you skip it, the cookies would collapse like a house of cards. For a slightly denser cookie, try adding a tablespoon of cornstarch; it will give a softer bite.
The Sweet & Salty Balance
Granulated sugar and packed brown sugar create the sweet base, while baking soda, baking powder, and salt work in tandem to lift the dough and control the flavor. Without the proper leavening, the cookies would be flat and heavy. If you prefer a less sweet cookie, reduce the granulated sugar by a quarter cup; the brown sugar will still keep the cookies moist.
The Peanut Butter Power
Creamy peanut butter adds both flavor and moisture, giving the cookies that signature nutty richness. It also helps bind the dough together. If you’re allergic or simply dislike peanut butter, smooth almond butter is a great substitute, though the flavor profile will shift slightly. A small pinch of sea salt on top before baking can elevate the peanut butter’s natural sweetness.
The Chocolate Chunk Crew
Chopped candy bars—think mini chocolate bars or even chocolate chips—are the star attraction. They melt slightly in the center, creating pockets of molten chocolate that make each bite exciting. If you’re craving a different flavor, try substituting white chocolate bars for a sweeter, creamier bite. The chocolate’s fat content also contributes to the cookie’s mouthfeel.
Everything’s prepped? Good. Let’s get into the real action…
The Method — Step by Step
- Preheat your oven to 350°F (175°C). Line two baking sheets with parchment paper or silicone mats. This step is crucial for even baking and prevents the cookies from sticking. Let the oven settle for a few minutes before placing the sheets inside.
- In a medium bowl, whisk together 2 cups all-purpose flour, 1 tsp baking soda, ½ tsp baking powder, and ½ tsp salt. The dry mix will ensure the leavening agents are evenly distributed, preventing uneven rise. Set this aside; you’re about to create a solid foundation.
- In a large mixing bowl, beat 1 cup softened unsalted butter, 1 cup granulated sugar, and 1 cup packed light brown sugar until the mixture is light, fluffy, and pale. This creaming process incorporates air, giving the cookies a tender crumb. When you lift the beaters, the mixture should hold a peak that doesn’t collapse.
- Add 2 tsp vanilla extract and 2 large eggs, one at a time, beating well after each addition. Then fold in 1 cup creamy peanut butter until the batter is smooth and glossy. This is the moment of truth; a well‑mixed batter will result in a uniform cookie.
- Gradually fold the dry flour mixture into the wet batter until just combined. Overmixing will develop gluten and produce tough cookies. The dough should be thick but manageable—if it’s too sticky, chill it for 10 minutes before shaping.
- Gently fold in 1 cup chopped chocolate candy bars, reserving a few for topping if desired. The chocolate should be evenly distributed so that each cookie has a generous amount of melted chocolate when baked. The chocolate’s fat content also helps keep the cookies moist.
- Drop rounded tablespoons of dough onto the prepared sheets, spacing them 2 inches apart. The dough will spread slightly, so don’t worry about it looking too flat. As the cookies bake, they’ll develop a golden edge that’s crisp yet soft inside.
- Bake for 10–12 minutes, or until the edges are golden and the centers look set but still slightly soft. The aroma of toasted butter and chocolate should fill your kitchen. Let the cookies rest on the sheet for 5 minutes before transferring them to a wire rack to cool completely.
- Optional: While the cookies are still warm, drizzle melted chocolate over them and let it set. This step adds a glossy finish and an extra layer of chocolatey decadence. The chocolate should harden within a few minutes, creating a sweet, crunchy top.
That's it — you did it. But hold on, I've got a few more tricks that'll take this to another level...
Insider Tricks for Flawless Results
The Temperature Rule Nobody Follows
Many bakers swear by 350°F, but the secret to perfect cookies is a slightly cooler oven—around 325°F. Lower heat gives the cookies time to rise slowly, creating a tender interior while still achieving a crisp edge. If you’re using a convection oven, reduce the temperature by 25°F to avoid over‑browning.
Why Your Nose Knows Best
The scent of a cookie baking is a powerful cue. When the butter starts to caramelize, you’ll notice a nutty aroma that signals the cookies are halfway through. Trust your nose; if the smell is intense, the cookies are ready for the next step. I’ve learned to let the scent guide me, and it’s always spot on.
The 5-Minute Rest That Changes Everything
After removing the cookies from the oven, let them rest on the sheet for 5 minutes. This brief pause allows the heat to distribute evenly, preventing the centers from being raw. When you lift them, the cookies should feel firm but still slightly warm, ready to cool on a rack.
Use a Silicone Mat for Effortless Cleanup
Parchment paper is great, but a silicone baking mat adds an extra layer of non-stick protection. It also makes cleanup a breeze—just wipe it down and you’re done. I’ve never had a cookie stick to the mat, even after multiple batches.
Freeze for Freshness
If you bake a large batch, freeze the cookies in an airtight container. When you’re ready to enjoy them, let them thaw at room temperature for 15 minutes. The cookies will retain their chewy center and crisp edges, tasting as fresh as when they first came out of the oven.
Creative Twists and Variations
This recipe is a playground. Here are some of my favorite ways to switch things up:
Nutty Extra: Almond Butter Swirl
Swap half the peanut butter for almond butter and swirl the two together before folding in. The almond butter adds a subtle, buttery crunch that pairs beautifully with the chocolate.
Chocolate Overload: Double Chocolate
Replace the candy bars with dark chocolate chips and add a tablespoon of cocoa powder to the dry mix. The result is a fudgy, chocolate‑centric cookie that satisfies every chocolate craving.
Spicy Kick: Chili Chocolate
Add a pinch of cayenne pepper to the batter and use spicy chocolate candy bars. The heat lingers on the palate, complementing the sweet peanut butter base.
Holiday Twist: Pumpkin Spice
During fall, stir in 1 tsp pumpkin pie spice and use pumpkin‑flavored candy bars. The warm spices add depth, making the cookies perfect for Thanksgiving or Halloween.
Health‑Focused: Coconut Flour Version
For a gluten‑free version, replace 1 cup of all-purpose flour with ¾ cup coconut flour and add an extra egg to bind the dough. The result is a chewy, slightly sweet cookie with a tropical twist.
Storing and Bringing It Back to Life
Fridge Storage
Store cooled cookies in an airtight container at room temperature for up to 5 days. For extra freshness, line the container with parchment paper to prevent sticking. The cookies will remain soft and flavorful throughout the week.
Freezer Friendly
Place the cooled cookies in a freezer‑safe zip‑top bag, removing as much air as possible. They’ll stay good for up to 3 months. When you’re ready to enjoy, let them thaw at room temperature for 15 minutes; the texture will be just like freshly baked.
Best Reheating Method
To revive the cookies, preheat the oven to 300°F (150°C). Place the cookies on a parchment‑lined tray and heat for 5–7 minutes, or until warmed through. Add a tiny splash of water (about 1 teaspoon) before reheating; it steams the cookies back to perfection, restoring moisture and crunch.