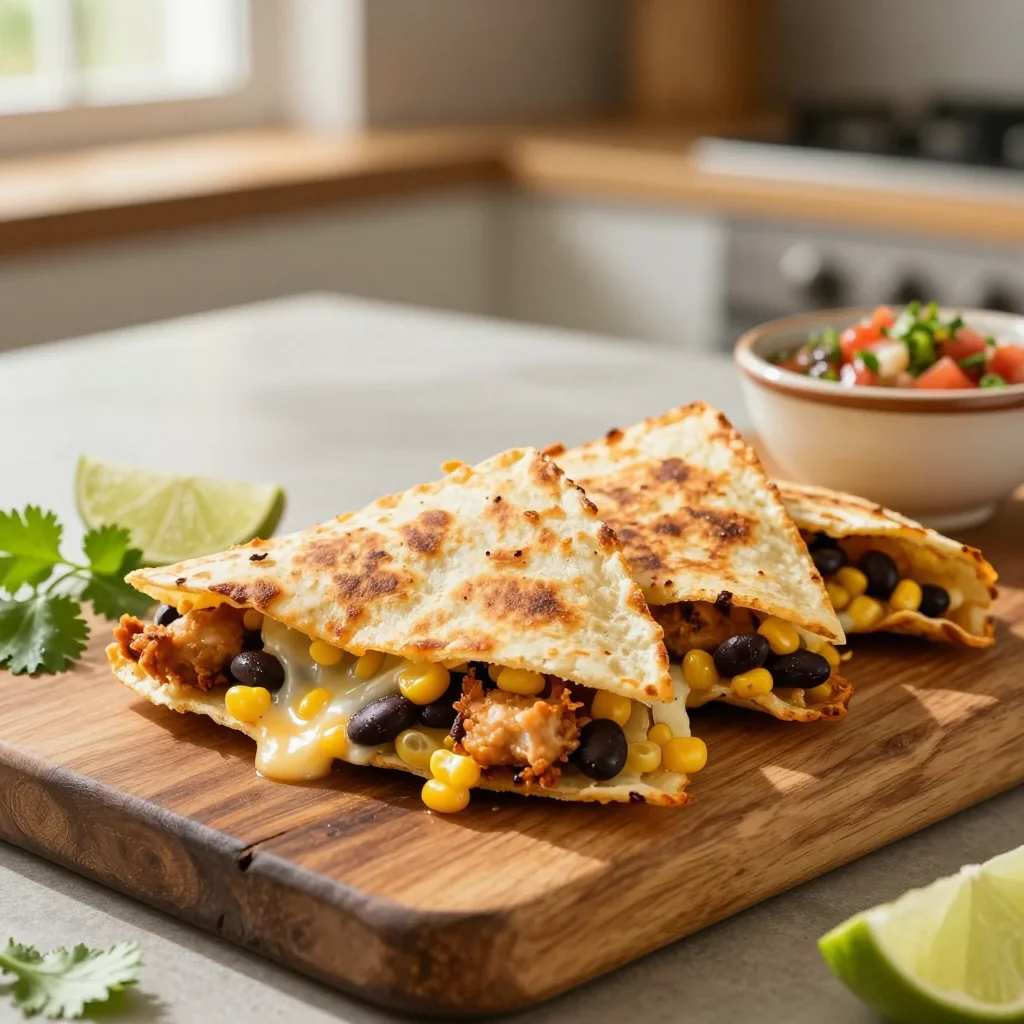
Crispy tortillas stuffed with juicy chicken, sweet corn, and hearty black beans—your new go‑to comfort food.
Personal Introduction
I still remember the first time I tasted a perfectly crisp quesadilla while traveling through the bustling streets of Oaxaca. The smoky aroma of the tortilla, the subtle heat from chilies, and the comforting bite of melted cheese wrapped around tender chicken made my heart race. That moment sparked a lifelong love affair with Mexican‑inspired comfort food, and I’ve been chasing that perfect balance of texture and flavor ever since.
Chicken quesadillas are a staple in my family gatherings, bridging the gap between a quick weeknight dinner and a festive weekend feast. The addition of sweet corn and earthy black beans not only adds color and nutrition but also layers of sweetness and creaminess that complement the savory chicken beautifully. This recipe honors that tradition while introducing a few modern twists that make it both wholesome and irresistibly tasty.
In this article, you’ll learn how to build a balanced filling, master the art of a golden‑brown tortilla, and create a quick lime‑cilantro sauce that elevates every bite. I’ll walk you through each step, share insider tips on ingredient selection, and reveal the secrets that keep the quesadillas from becoming soggy.
I’m thrilled to share this recipe with you, and I hope it becomes a beloved part of your kitchen repertoire just as it has in mine. Let’s get cooking!
🌟 Why This Recipe Will Captivate You
From the first sizzle to the final bite, this dish delivers a harmony of flavors, textures, and nutrition that makes it a standout on any table.
- ✨ Balanced Protein & Fiber: Juicy chicken paired with black beans provides a complete protein source while the beans add soluble fiber that keeps you full longer.
- ✨ Vibrant Color Palette: The golden corn, deep‑black beans, and bright red peppers create a visual feast that makes the dish as pleasing to the eye as it is to the palate.
- ✨ Quick & Flexible: With a total time under 40 minutes, you can whip up a restaurant‑quality meal on a busy weekday, and the recipe scales effortlessly for larger gatherings.
- ✨ Customizable Heat: Adjust the chili powder or add a dash of hot sauce to suit your spice tolerance, making it perfect for both mild and bold eaters.
- ✨ Nutrient‑Dense: Each serving offers a healthy dose of vitamins A and C from the peppers, potassium from the corn, and essential iron from the black beans.
- ✨ Crowd‑Pleaser: Whether you’re feeding kids, friends, or a dinner party, the combination of crispy exterior and melty interior satisfies a wide range of taste preferences.
🥗 Ingredients
📝 Complete Ingredient List
For the Filling:
For the Lime‑Cilantro Sauce:
For Garnish:
🔍 Focus on Key Ingredients
Shredded Cooked Chicken
Using pre‑cooked, shredded chicken saves time and ensures the meat stays moist inside the quesadilla. I recommend poaching chicken breasts in a light broth with a bay leaf and peppercorns, then pulling them apart with two forks. This method yields tender strands that absorb the spices without becoming dry during the quick pan‑fry.
Corn Kernels
Fresh or frozen corn adds a burst of natural sweetness that balances the earthiness of the black beans. If you’re using frozen, thaw them briefly in the microwave and pat dry to avoid excess moisture, which could make the tortillas soggy.
Black Beans
Black beans are a powerhouse of protein, fiber, and iron. Rinsing canned beans removes the briny liquid and improves texture. For a deeper flavor, sauté the beans with a pinch of cumin and smoked paprika before mixing them into the filling.
🔄 Quick Substitutions
| If you don’t have... | Use instead... |
|---|---|
| Flour tortillas | Corn tortillas (use double‑wrap technique) |
| Queso fresco | Feta or crumbled goat cheese |
| Chicken | Shredded pork, tofu, or tempeh for a vegetarian version |
👨🍳 Step‑by‑Step Instructions
Follow these detailed steps to create perfectly crisp quesadillas with a juicy, flavorful filling.
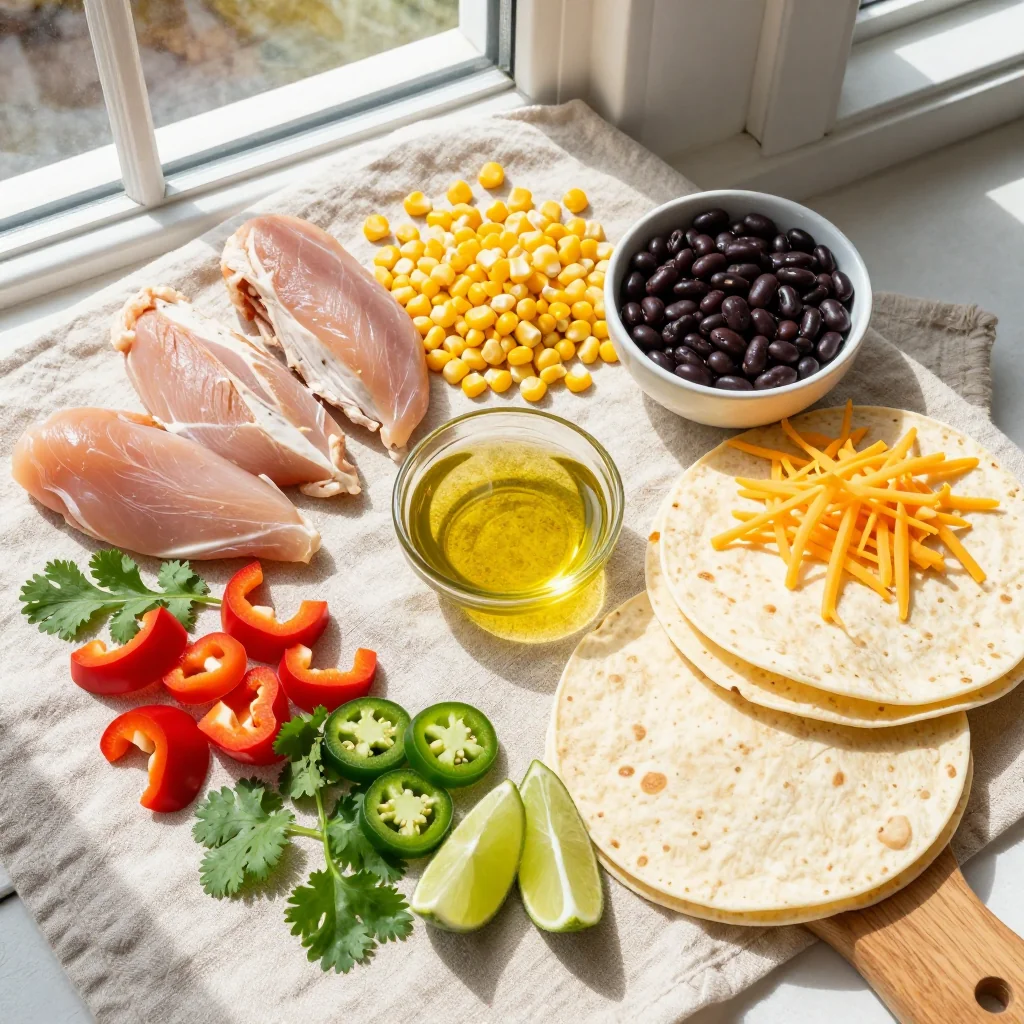
📋 Phase 1: Preparation & Mise en Place
Gather and prep all ingredients before you start cooking; this ensures a smooth assembly process.
Prepare the Chicken Filling
Heat a large skillet over medium heat and add a splash of olive oil. Toss in the minced garlic, red onion, and both bell peppers. Sauté for 3‑4 minutes until the vegetables soften and release their aromas. Add the shredded chicken, corn, and black beans, stirring to combine. Sprinkle in cumin, smoked paprika, chili powder, and season with salt and pepper. Cook for another 4‑5 minutes, allowing the flavors to meld and any excess liquid to evaporate. The mixture should be fragrant, slightly caramelized, and dry enough that it won’t make the tortillas soggy.
Make the Lime‑Cilantro Sauce
In a small bowl, whisk together sour cream, fresh lime juice, chopped cilantro, and hot sauce if using. Adjust the lime intensity to your preference—more juice adds brightness, while less keeps the sauce mellow. Set aside; the sauce will stay fresh and creamy while you assemble the quesadillas.
🔥 Phase 2: Cooking & Assembly
Now we’ll bring everything together and achieve that coveted golden crust.
Assemble the Quesadillas
Lay a tortilla flat on a clean surface. Spread a generous spoonful of the chicken‑corn‑bean mixture over half of the tortilla, leaving a small border. Drizzle a thin line of the lime‑cilantro sauce on top of the filling, then sprinkle a modest amount of crumbled queso fresco. Fold the tortilla in half, pressing gently to seal. Repeat for the remaining tortillas.
Pan‑Fry the Quesadillas
Heat a clean non‑stick skillet or cast‑iron pan over medium‑high heat. Add a thin layer of oil (just enough to coat the surface). Place one assembled quesadilla in the pan and cook for 2‑3 minutes, pressing lightly with a spatula. Flip when the underside turns a deep golden brown and the cheese inside begins to melt. Cook the other side for another 2‑3 minutes. Adjust the heat as needed to avoid burning—if the tortilla browns too quickly, lower the temperature slightly.
Rest and Slice
Transfer the cooked quesadilla to a cutting board and let it rest for 30 seconds. This short rest allows the cheese to set, making slicing cleaner. Cut each quesadilla into 3‑4 wedges using a sharp knife or pizza cutter. Arrange the wedges on a serving platter, keeping the warm ones covered loosely with foil.
✨ Phase 3: Finishing Touches & Serving
The final details bring the dish together and make it restaurant‑ready.
Check for Doneness
The quesadilla is ready when the tortilla is crisp, the cheese is fully melted, and the filling is hot throughout. A quick touch with the back of a spoon should feel hot to the touch; if not, give it another minute in the pan.
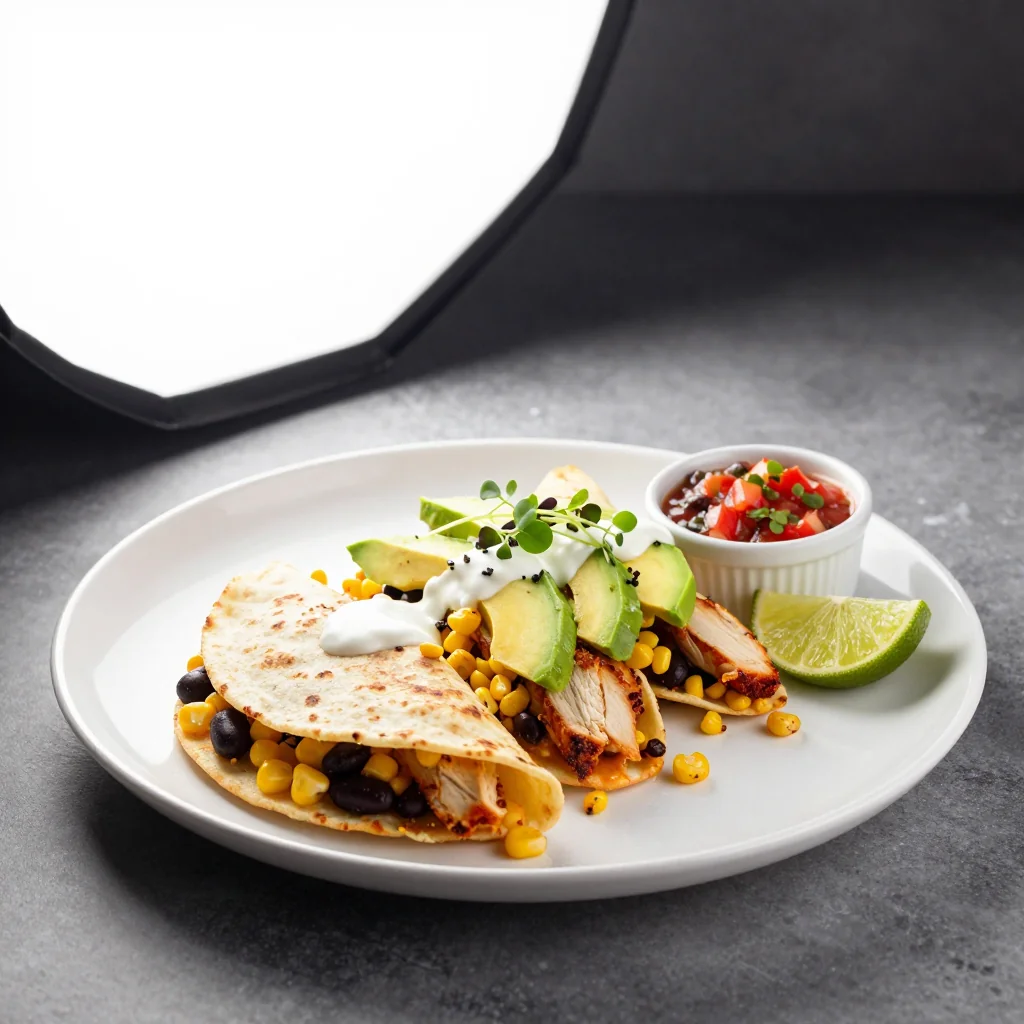
Garnish and Plate
Top each wedge with a slice of avocado, a sprinkle of fresh cilantro, and a few extra crumbles of queso fresco. Add a lime wedge on the side for a fresh burst of acidity right before eating. The contrast of creamy avocado, tangy sauce, and the smoky tortilla creates a multilayered tasting experience.
Serve and Enjoy
Serve the quesadillas hot, accompanied by the remaining lime‑cilantro sauce for dipping. Pair with a simple mixed green salad or a side of pico de gallo for extra freshness. This dish shines as a main course or as a hearty appetizer for a gathering.
💡 Expert Tips & Tricks
🛒 Choosing the Best Ingredients
Opt for free‑range or organic chicken breasts; they tend to retain moisture better when shredded. When selecting corn, look for kernels that are plump and bright yellow—avoid any with brown spots. For black beans, if you have time, soak dried beans overnight and cook them yourself; this yields a richer flavor and firmer texture than canned.
🔪 Preparation Techniques
Use a food processor to shred cooked chicken quickly, or pull it apart by hand for a more rustic texture. When dicing peppers, cut them into uniform ½‑inch pieces to ensure even cooking. Mince garlic finely to prevent large bits from burning during sautéing.
🌡️ Mastering the Cooking Process
Preheat the skillet before adding oil; this prevents the tortilla from soaking up excess fat. Cook each side just until golden brown—overcooking leads to a tough tortilla. If you notice the cheese isn’t melting quickly enough, cover the pan briefly with a lid for 30 seconds to trap steam.
🍽️ Presentation & Service
For a polished look, arrange wedges in a fan shape on a large white plate. Drizzle a thin line of the lime‑cilantro sauce across the plate for a modern touch. Add a sprinkle of fresh cilantro leaves and a few lime zest curls to enhance visual appeal.
🏆 Pro Tips
Elevate your quesadilla game from good to extraordinary with these professional insights.
- 🎯 Temperature Control: Use a medium‑high heat (around 190‑200 °C) for the pan. This range crisps the tortilla quickly while keeping the interior moist. If the tortilla browns too fast, lower the heat to avoid burning the outer layer before the cheese melts.
- 🎯 Double‑Layer Technique: For an extra‑crunchy exterior, lightly brush the outside of each tortilla with melted butter before cooking. This creates a buttery, golden crust reminiscent of restaurant‑style quesadillas.
- 🎯 Ingredient Distribution: Spread the filling evenly across the tortilla, avoiding clumps. Even distribution ensures consistent flavor in every bite and prevents the tortilla from breaking under the weight of the filling.
- 🎯 Resting the Filling: After sautéing, let the filling rest for a couple of minutes. This allows excess moisture to evaporate, which is crucial for keeping the tortilla crisp.
- 🎯 Cheese Choice: Blend shredded Monterey Jack with a touch of sharp cheddar for a melty yet flavorful cheese base. The Monterey Jack offers smooth meltability, while cheddar adds depth.
- 🎯 Scaling the Recipe: When increasing servings, multiply each ingredient proportionally, but keep the tortilla count as the limiting factor. For 8 servings, double the filling but use 16 tortillas.
"The secret to a perfect quesadilla lies in the balance between a crunchy shell and a juicy, flavorful interior." — Enrique Olvera, Renowned Mexican Chef
🔄 Variations & Adaptations
This versatile recipe can be tweaked to suit dietary preferences, flavor cravings, and seasonal produce.
🥬 Vegetarian / Vegan Version
Replace the chicken with 2 cups of shredded jackfruit or firm tofu marinated in the same spice blend. Use a plant‑based sour cream (such as cashew‑based) for the sauce, and swap queso fresco for a vegan feta or nutritional yeast for a cheesy note.
- Jackfruit provides a texture similar to shredded chicken.
- Tofu absorbs flavors well when pressed and marinated.
🌶️ Flavor Variations
Experiment with regional twists to keep the dish exciting. Below are three popular adaptations.
Spicy Version:
Add 1 finely chopped jalapeño to the filling and increase chili powder to 1 tsp. Finish with a drizzle of chipotle adobo sauce for smoky heat.
Mediterranean Version:
Incorporate ¼ cup chopped sun‑dried tomatoes, a sprinkle of oregano, and replace queso fresco with crumbled feta. Serve with a side of tzatziki.
Asian Fusion Version:
Swap cumin and smoked paprika for 1 tsp Chinese five‑spice powder, add shredded carrots, and serve with a soy‑ginger dipping sauce.
⚠️ Dietary Adaptations
Gluten‑Free:
Use corn tortillas or gluten‑free flour tortillas. Ensure the tortillas are labeled 100 % gluten‑free to avoid cross‑contamination.
Lactose‑Free:
Substitute sour cream with lactose‑free yogurt or a cashew‑based cream. Choose a dairy‑free cheese alternative that melts well.
Low‑Calorie:
Reduce the oil used for pan‑frying by using a non‑stick spray. Opt for low‑fat cheese and limit avocado garnish to thin slices.
👶 Family / Kids Version
Kids often love milder flavors, so omit the chili powder and hot sauce. Use a mild cheddar cheese and serve with a side of mild salsa. Cut the quesadillas into small bite‑size triangles for easy handling.
📦 Storage & Reheating
🧊 Conservation
Refrigerator:
- Duration: 3 days
- Container: Airtight plastic container or zip‑lock bag
- Tip: Place a paper towel between layers to absorb moisture.
Freezer:
- Duration: 2 months
- Method: Wrap each quesadilla tightly in parchment paper, then place in a freezer‑safe bag.
- Defrosting: Transfer to refrigerator overnight or use the microwave’s defrost setting.
💡 For best texture, reheat from frozen using the oven method rather than the microwave.
♨️ Reheating
🔥 Oven (Recommended):
- Preheat to 180 °C (350 °F).
- Place quesadillas on a baking sheet, cover loosely with aluminum foil.
- Heat for 10 minutes.
- Remove foil and continue for 3‑4 minutes to crisp the tortilla.
⚡ Microwave (Quick):
- Place quesadilla on a microwave‑safe plate, cover with a microwave‑safe lid.
- Heat on medium power for 45 seconds.
- Flip and heat for another 30‑45 seconds.
- Check for hotness; add a few more seconds if needed.
🍳 Skillet:
Heat a non‑stick skillet over medium heat, add a tiny drizzle of oil, and warm each side for 2‑3 minutes until crisp.
🍷 Perfect Pairings
🥗 Side Dishes
- Fresh Pico de Gallo: The bright acidity of tomatoes, onion, cilantro, and lime cuts through the richness of the quesadilla.
- Mexican Street Corn Salad (Esquites): Charred corn kernels tossed with mayo, cotija, and chili powder complement the corn inside the quesadilla.
- Simple Mixed Green Salad: Lightly dressed with lime vinaigrette adds freshness without overpowering the main dish.
🍷 Wine & Beverage Pairings
- Albariño (Spanish White): Its crisp acidity and subtle fruit notes match the lime‑cilantro sauce.
- Rosé from Provence: Light, dry, and slightly fruity, perfect for a sunny lunch.
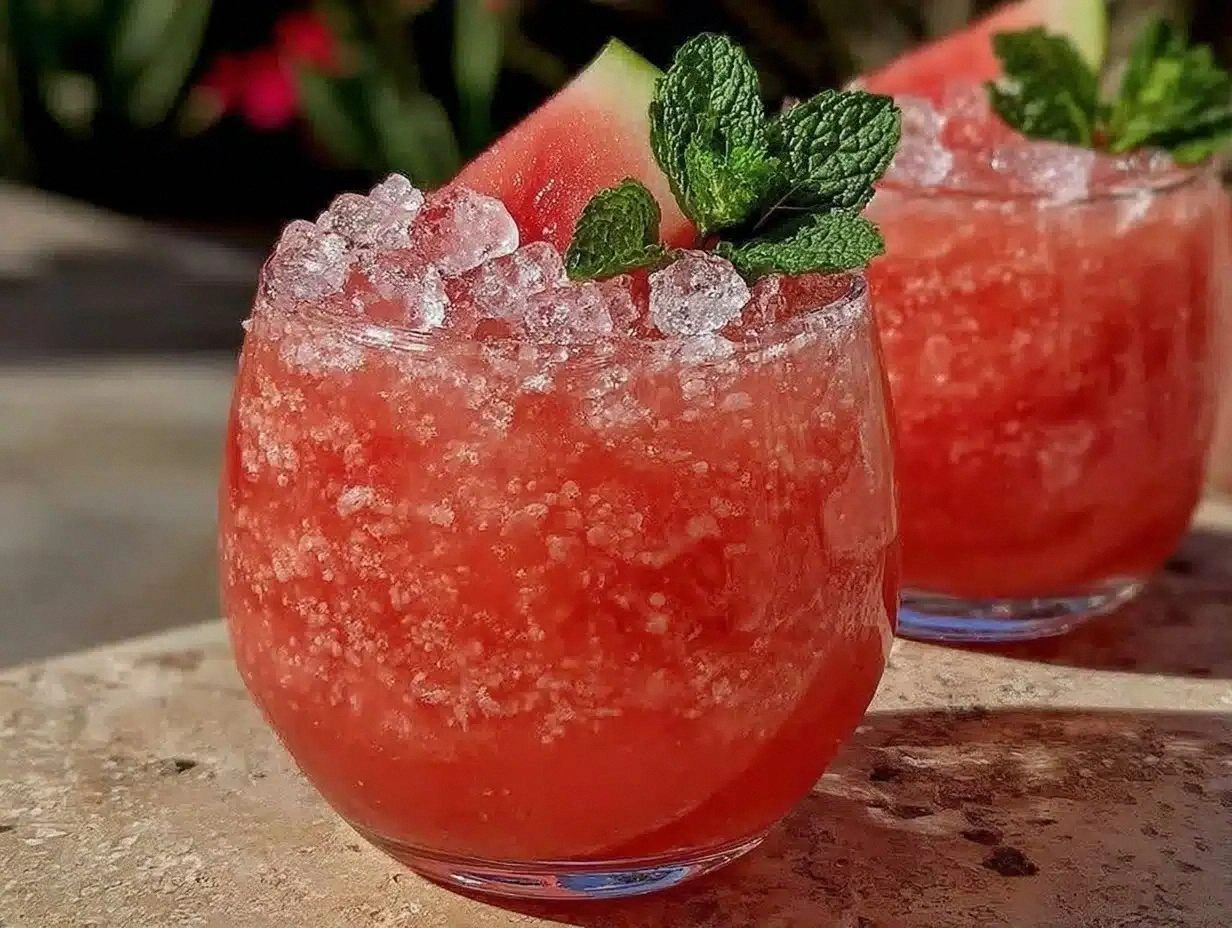
- Non‑Alcoholic Option: Sparkling lime‑infused water or a chilled agua fresca (like watermelon).
🍰 For a Complete Meal
Begin with a light avocado‑lime soup or a chilled cucumber gazpacho. Follow the quesadillas with a bright mango‑lime sorbet to cleanse the palate. Finish with a simple chocolate mousse dusted with a pinch of sea salt for a sweet‑salty finale.
❓ Frequently Asked Questions
Q: Can I use whole‑wheat tortillas instead of flour?
Absolutely. Whole‑wheat tortillas add a nutty flavor and extra fiber. They may be slightly less pliable, so warm them briefly in the microwave before filling to prevent tearing.
Q: How do I prevent the quesadilla from becoming soggy?
The key is to keep the filling dry. After sautéing the vegetables and beans, let the mixture reduce until most of the liquid evaporates. Pat the corn and beans with a paper towel if they release excess moisture. Also, avoid over‑filling the tortilla.
Q: What’s the best way to reheat leftovers without losing crispness?
Reheat in a preheated oven at 180 °C (350 °F) for 10‑12 minutes, uncovered, to restore the crust. Microwaving is faster but can make the tortilla rubbery; if you must use a microwave, add a brief 30‑second burst in a hot skillet afterward.
Q: Can I freeze the assembled but uncooked quesadillas?
Yes. Assemble the quesadillas, wrap each tightly in parchment paper, place them in a freezer bag, and freeze. When ready to cook, add a few extra minutes to the pan‑frying time to account for the frozen state.
Q: How can I make this recipe gluten‑free?
Substitute the flour tortillas with certified gluten‑free corn tortillas or gluten‑free flour tortillas. Ensure all other ingredients (like the sauce) are also gluten‑free, especially if you add hot sauce.
Q: Is there a way to make the quesadillas lower in calories?
Use low‑fat cheese, reduce the amount of oil for pan‑frying, and serve with a side salad instead of a carb‑heavy accompaniment. You can also replace some of the chicken with extra beans for added protein without extra fat.
🎉 Let’s Get Cooking!
This Chicken Quesadilla recipe brings together the comforting familiarity of a classic favorite with fresh, vibrant ingredients that make each bite exciting. The combination of juicy chicken, sweet corn, hearty black beans, and a bright lime‑cilantro sauce creates a balanced flavor profile that satisfies both the palate and the soul. Whether you’re feeding a family, hosting friends, or simply craving a quick weeknight dinner, these quesadillas deliver on taste, texture, and nutrition.
I encourage you to experiment with the suggested variations—add a dash of heat, swap in seasonal vegetables, or make it entirely plant‑based. The flexibility of this recipe means it can grow with your culinary curiosity. So, roll up your sleeves, gather your ingredients, and enjoy the process of creating something truly delicious.
Have you tried this recipe?
Leave a comment and rating below! Share your photos on Instagram with #QuesadillaMagic for a chance to be featured.
Chicken Quesadillas with Corn and Black Beans
Crispy tortillas packed with juicy chicken, sweet corn, and hearty black beans.
📝 Ingredients
Filling
Sauce
Garnish
👨🍳 Instructions
- 1
Heat a skillet, sauté garlic, onion, and peppers until softened.
- 2
Add chicken, corn, black beans, and spices; cook until moisture evaporates.
- 3
Whisk sour cream, lime juice, cilantro, and hot sauce for the sauce.
- 4
Assemble each tortilla with filling, sauce, and cheese; fold in half.
- 5
Pan‑fry each quesadilla 2‑3 minutes per side until golden.
- 6
Rest briefly, then cut into wedges.
- 7
Garnish with avocado, queso fresco, cilantro, and lime wedges.
- 8
Serve hot with extra sauce on the side.
- 9
Store leftovers in an airtight container; reheat in oven for crispness.
- 10
Enjoy and share your creation with friends!
🥗 Nutritional Information (per serving)
*Values are approximate and based on standard ingredient brands.
📚 You Might Also Like

Spicy Shrimp Tacos with Mango Salsa

Vegetarian Black Bean Enchiladas

Chicken Fajita Bowl with Cilantro Lime Rice

Cheesy Beef Quesadillas
💬 Comments & Reviews
No comments yet. Be the first to share your thoughts!

Leave a Comment