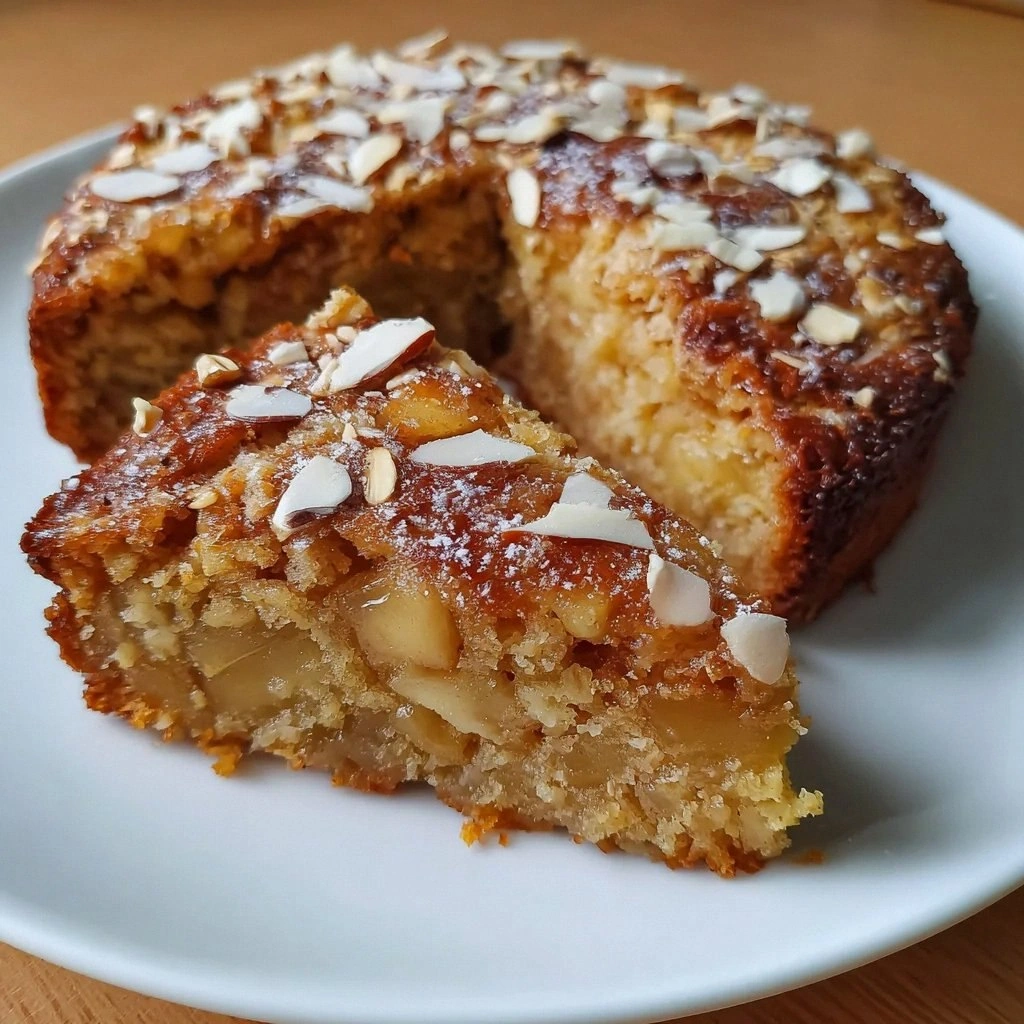
Okay, picture this: I was halfway through a marathon Netflix binge, my stomach growling louder than the opening credits of a thriller, and the only thing I could think of was a slice of cake that wouldn’t make my waistline scream. I raided the pantry, found a sad, half‑melted block of butter, a wilted apple, and a bag of oats that had been hiding behind the cereal for weeks. I threw everything together, set it in the oven, and—miracle of miracles—the kitchen filled with a scent so warm it could have coaxed a snowflake to melt. I took one bite, and honestly, I ate half the batch before anyone else could even sniff the aroma. That moment sparked a confession: I had just stumbled on the most guilt‑free, heart‑happy cake of my life.
Now, let’s talk senses. The moment the batter hits the bowl, you hear the gentle rustle of oats like a whispering crowd cheering you on. The apples, when they tumble in, release a sweet, crisp perfume that makes the whole house feel like a cozy orchard in autumn. As the cake bakes, the oven hums a low lullaby while the top turns a golden‑brown that looks like a sunrise you can actually eat. When you finally pull it out, the crust cracks just enough to let a puff of steam escape, carrying with it a buttery, honey‑kissed aroma that makes you want to hug the pan. The first forkful is a symphony of textures: the oat‑y crumb is dense enough to satisfy, yet airy enough to keep you guessing, while the apple pieces give a juicy pop that’s practically a flavor fireworks show.
Why does this version stand out from every other “healthy apple cake” you’ve ever Googled? First, the oats are not just a filler; they’re the backbone, giving the cake a hearty, fibrous chew that you just can’t get from plain flour. Second, the honey isn’t a cheat‑sweetener—it’s a natural, liquid gold that adds moisture and a subtle floral note that sugar can never mimic. Third, the plain yogurt replaces oil and adds a tangy brightness that cuts through the sweetness, keeping the flavor balanced and the crumb moist. Fourth, the combination of baking soda and powder is a scientific duet that lifts the cake to fluffy perfection without turning it into a sponge that collapses. Fifth, the butter (or coconut oil) is used sparingly, just enough to give richness without the guilt. And finally, the whole thing is baked in a single pan, meaning cleanup is as quick as the bake time—no extra dishes, no extra drama.
I’m about to drop a technique that most recipes completely skip: I toast the rolled oats lightly before blending them into a fine flour. This step unlocks a nutty depth that makes the cake taste like it’s been slow‑cooked in a rustic kitchen for hours. Trust me, this is the game‑changer that turns a good cake into a legendary one. Let me walk you through every single step — by the end, you’ll wonder how you ever made it any other way.
What Makes This Version Stand Out
- Texture: The oat‑based crumb is both hearty and airy, creating a satisfying bite that feels indulgent without the heaviness.
- Flavor: A perfect balance of sweet honey, tart yogurt, and warm cinnamon gives each forkful a layered, comforting taste.
- Health Factor: Swapping refined flour for rolled oats and using honey instead of refined sugar cuts the glycemic load dramatically.
- Simplicity: Only ten core ingredients, all of which you probably already have in your pantry, make this a no‑stress recipe.
- Versatility: The cake can be served warm with a dollop of Greek yogurt, chilled as a snack, or even turned into mini cake bites for a party.
- Crowd Reaction: Friends who swear they only eat “cheat” desserts end up asking for seconds—yes, I dare you to taste this and not go back for seconds.
- Make‑Ahead Potential: It stores beautifully, meaning you can bake it on a Sunday and enjoy it all week without losing flavor.
- Ingredient Quality: Using fresh, crisp apples and high‑quality honey turns a simple cake into a gourmet experience.
Inside the Ingredient List
The Flavor Base
The honey and vanilla extract are the dynamic duo that set the sweet stage. Honey isn’t just a sweetener; it’s a humectant, meaning it locks moisture into the crumb, keeping each slice soft for days. If you ever wonder why some cakes dry out faster than a desert, it’s usually because they skipped the honey. Vanilla extract, on the other hand, adds a subtle floral note that amplifies the apple’s natural sweetness without overpowering it. If you’re feeling adventurous, swap half the honey for maple syrup for a caramel‑kissed twist.
The Texture Crew
Rolled oats are the star of the texture show. They bring fiber, a pleasant chew, and a nutty backdrop that plain flour can’t compete with. Ground cinnamon not only adds warmth but also helps regulate blood sugar—a tiny bonus for the health‑conscious. Baking soda and baking powder work together like a well‑rehearsed dance duo; the soda reacts with the apple’s natural acidity while the powder provides a steady lift. Unsalted butter or coconut oil adds richness, but because we keep the amount modest, the cake stays light. If you’re dairy‑free, coconut oil is a perfect swap that also adds a faint tropical aroma.
The Unexpected Star
Plain yogurt is the secret weapon that most recipes overlook. Its acidity tenderizes the oat flour, creating a crumb that’s moist yet not gummy. The tang from the yogurt balances the honey’s sweetness, preventing the cake from becoming cloyingly sweet. If you’re vegan, a thick coconut yogurt works just as well, though it will add a faint coconut flavor that pairs nicely with the apple.
The Final Flourish
Eggs are the binding agents that hold everything together, giving the cake structure and a subtle richness. Two large eggs are enough to bind the oat flour, fruit, and butter without making the cake overly dense. Finally, fresh apples—peeled, cored, and diced—add moisture, natural sweetness, and a delightful bite. Choose a firm variety like Honeycrisp or Granny Smith for a perfect balance of tart and sweet. If you can’t find fresh apples, a cup of frozen diced apples (thawed and drained) works in a pinch.
Everything's prepped? Good. Let’s get into the real action…
The Method — Step by Step
Preheat your oven to 350°F (175°C) and grease a 9‑inch round cake pan with a thin layer of butter or coconut oil. While the oven warms up, take a moment to savor the anticipation—there’s a certain magic in that pre‑heat beep that tells you something delicious is about to happen. Place a parchment circle at the bottom of the pan; this tiny trick ensures the cake releases cleanly without a single stubborn crumb clinging to the sides.
Toast the rolled oats in a dry skillet over medium heat for 3‑4 minutes, stirring constantly until they turn a light golden brown and release a nutty aroma. This step is pure alchemy: the heat unlocks hidden flavors that will echo throughout the cake. Once toasted, let them cool for a minute, then transfer to a food processor and blitz until you have a fine oat flour. Pro tip: If you don’t have a processor, a sturdy zip‑top bag and a rolling pin work in a pinch.
In a large mixing bowl, whisk together the oat flour, ground cinnamon, baking soda, and baking powder. The dry ingredients should look like a speckled snowstorm—tiny flecks of cinnamon dancing among the powdery oat clouds. Kitchen Hack: Sift the mixture briefly to break up any stubborn clumps; this guarantees an even rise and a smooth crumb.
Kitchen Hack: Use a whisk instead of a fork to blend the dry ingredients; the extra aeration helps the leavening agents work more efficiently.In a separate bowl, combine the melted butter (or coconut oil), honey, and vanilla extract. Stir until the mixture is glossy and slightly thickened—this is the sweet, buttery base that will coat every oat particle. Add the eggs one at a time, whisking vigorously after each addition. The eggs should incorporate fully, creating a glossy, slightly frothy mixture that looks like liquid sunshine.
Fold the plain yogurt into the wet mixture, then gently stir in the diced apples. The apples will soften slightly but retain enough bite to give you that satisfying crunch in every bite. If you’re using frozen apples, make sure they’re thawed and patted dry; excess water will make the batter too runny.
Now, the moment of truth: combine the wet and dry mixtures. Using a rubber spatula, fold them together in a gentle “over‑and‑under” motion until just combined. Over‑mixing is the villain that can turn a fluffy cake into a dense brick. You’ll notice a few streaks of flour—this is perfectly fine; the batter will smooth out as it bakes. Watch Out: If the batter looks too thick, drizzle in a tablespoon of milk or extra yogurt; if it’s too runny, sprinkle a tablespoon of oat flour.
Watch Out: Do not over‑fold the batter; a few flour pockets are better than a tough, over‑worked cake.Pour the batter into the prepared pan, smoothing the top with a spatula. The surface should spread evenly, with a slight dome in the middle—that’s where the rise will happen. Slide the pan onto the middle rack of the oven and set a timer for 30 minutes. While it bakes, the kitchen will fill with the aroma of cinnamon, honey, and toasted oats—trust me, you’ll want to peek, but resist the urge until the timer dings.
After 30 minutes, insert a toothpick into the center. If it comes out clean or with just a few moist crumbs, the cake is done. The edges should be pulling away from the pan, a visual cue that the crumb has set. If you see a wet batter, give it another 5‑7 minutes; ovens vary, and a little patience pays off.
Allow the cake to cool in the pan for 10 minutes, then run a thin knife around the edge and invert onto a cooling rack. This step prevents the bottom from becoming soggy. Let it cool completely before slicing; the flavors will continue to meld as the cake rests. And now, the fun part—drizzle a thin stream of honey over the top or serve with a dollop of Greek yogurt for extra tang.
That’s it — you did it. But hold on, I’ve got a few more tricks that’ll take this to another level…
Insider Tricks for Flawless Results
The Temperature Rule Nobody Follows
Most home bakers assume “350°F is the magic number.” In reality, a slightly lower temperature (325°F) can give you a more even rise, especially when using dense oat flour. The lower heat allows the interior to set before the exterior over‑browns, resulting in a uniformly golden crust and a tender crumb. I once baked at 350°F and the edges turned crispy while the center stayed a bit gummy—lesson learned. Next time, preheat to 325°F and extend the bake by 5‑7 minutes; you’ll thank me when the cake pulls away from the pan with a perfect, even edge.
Why Your Nose Knows Best
Your sense of smell is a far more reliable indicator of doneness than a timer. When the cake is about 5 minutes from finishing, the kitchen will start to smell like a caramel‑apple orchard—sweet, warm, and slightly nutty. If you catch that scent, it’s a green light to check the toothpick. Over‑baking can dry out the oats, turning the crumb into a sandpaper texture. Trust your nose; it’s the secret weapon of seasoned bakers.
The 5‑Minute Rest That Changes Everything
After the cake has cooled on a rack, let it sit uncovered for an extra five minutes before slicing. This brief rest allows the steam to escape, preventing a soggy bottom, and gives the flavors a chance to settle. I used to cut straight away and end up with a crumb that was too crumbly; the rest period gives the structure a chance to firm up, making each slice neat and tidy. It’s a tiny step with a massive payoff.
Apple Prep Perfection
When dicing apples, aim for uniform ½‑inch cubes. Uniform pieces bake evenly, ensuring that every bite has the same balance of fruit and cake. If the pieces are too large, they’ll stay crisp and may dominate the texture; too small, and they’ll melt into the batter, losing that delightful pop. A quick tip: toss the diced apples in a splash of lemon juice to prevent browning while you finish the batter.
Butter vs. Coconut Oil Showdown
Unsalted butter brings a classic richness, while coconut oil adds a subtle tropical note and keeps the cake dairy‑free. If you’re aiming for the richest flavor, melt the butter slowly over low heat to avoid scorching. If you prefer coconut oil, use the refined version so you don’t get a strong coconut flavor unless that’s your intention. Both work, but the choice will subtly shift the final taste profile.
Creative Twists and Variations
This recipe is a playground. Here are some of my favorite ways to switch things up:
Berry Burst
Swap half the apples for a cup of mixed berries—blueberries, raspberries, and blackberries. The berries add a tangy pop and a gorgeous purple speckle throughout the cake. Pair with a dollop of vanilla Greek yogurt for a breakfast‑worthy treat.
Spiced Autumn
Add a pinch of ground nutmeg and a splash of maple syrup in place of half the honey. The nutmeg deepens the warm spice profile, while maple brings a caramel undertone that screams fall. Perfect for a cozy weekend brunch.
Citrus Zing
Incorporate the zest of one orange and replace half the apple with finely diced dried apricots. The orange zest lifts the flavor, giving the cake a bright, sunny finish. This version pairs beautifully with a light cream cheese frosting.
Chocolate Chip Surprise
Fold in a half‑cup of dark chocolate chips right before baking. The chocolate melts into pockets of gooey goodness, creating a delightful contrast to the tart apples. If you’re a chocolate lover, this is the ultimate cheat‑free indulgence.
Nutty Crunch
Add a quarter‑cup of toasted chopped walnuts or pecans to the batter. The nuts contribute a buttery crunch and extra healthy fats, making the cake even more satisfying. Just be mindful of allergies if you’re serving a crowd.
Storing and Bringing It Back to Life
Fridge Storage
Let the cake cool completely, then wrap it tightly in plastic wrap or store in an airtight container. It will stay fresh in the refrigerator for up to 5 days. When you’re ready to eat, slice and enjoy cold, or give it a quick 10‑minute warm‑up in the microwave for a soft, comforting bite.
Freezer Friendly
Slice the cake into individual portions, wrap each slice in parchment paper, then place them in a zip‑top freezer bag. The cake freezes beautifully for up to 3 months. To revive, let a slice thaw at room temperature for 15 minutes, then microwave for 20 seconds with a tiny splash of water; the steam will bring back that just‑baked moisture.
Best Reheating Method
For the ultimate reheated slice, preheat your oven to 300°F (150°C), place the slice on a foil‑lined baking sheet, and heat for 8‑10 minutes. Add a teaspoon of water to the edge of the slice before reheating; the steam created inside the foil packet restores the cake’s softness without drying it out.