I was halfway through a week of culinary experiments when my oven decided to throw a tantrum. The timer beeped, the timer beeped again, and my perfectly baked loaf of bread turned into a charcoal slab. I stared at the blackened crumb, feeling the sting of disappointment like a bad punchline. Then, out of the corner of my eye, a single, perfectly golden brownie appeared from the oven, its surface shimmering with a glossy sheen. That was the moment I realized that a single, fudgy brownie could be the antidote to culinary chaos.
Imagine the aroma of chocolate melting into butter, the faint scent of vanilla drifting through the air, the gentle hiss of butter sizzling in a pan—every sense screaming that something delicious is about to happen. The kitchen lights cast a warm glow that makes the chocolate look like liquid midnight. My eyes widen as I watch the batter swirl, the cocoa powder coating the surface like velvet. The sound of the spoon scraping the bowl is a gentle lullaby, and the anticipation tastes sweet, almost tangy, in the back of my throat. The texture of the batter, thick and glossy, feels like a promise of decadence. I can almost taste the first bite, the melt that lingers on the tongue like a memory.
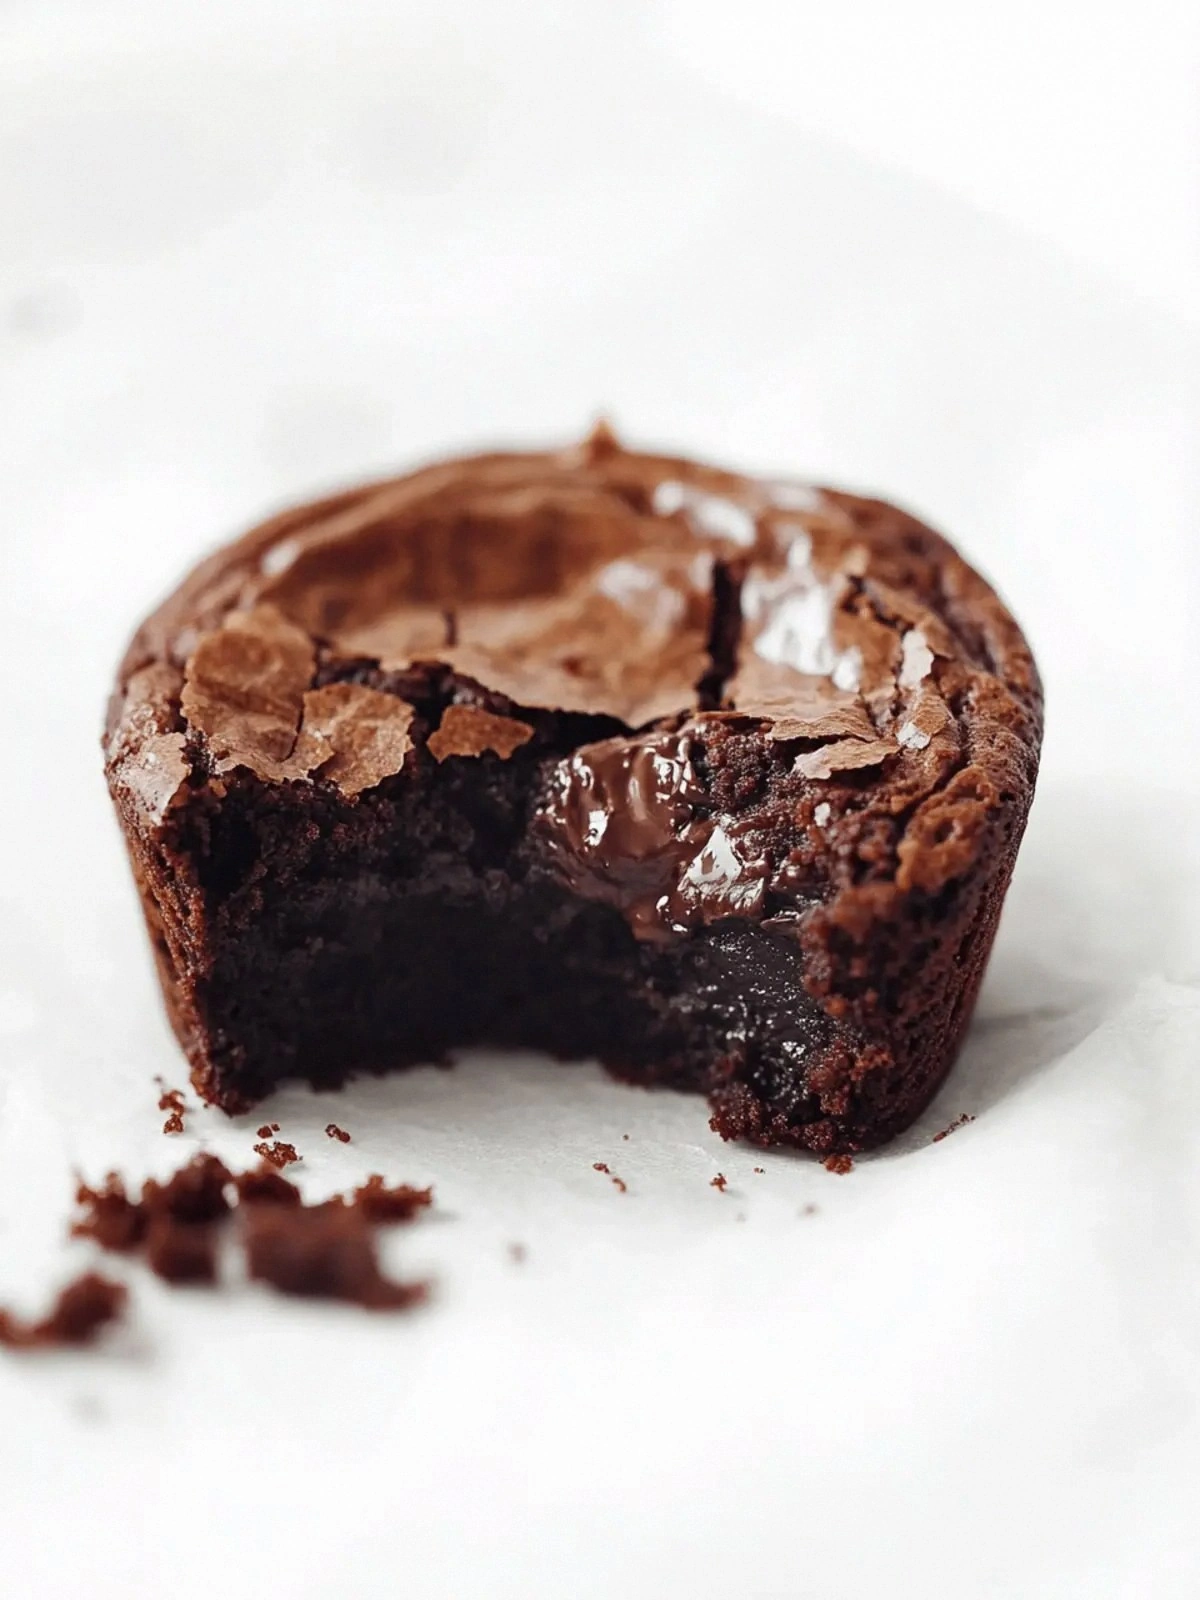
This isn’t just another brownie recipe; it’s a single-serve masterpiece that redefines what you expect from a dessert. Most brownie recipes aim for a thick, chewy slab, but this version is a silky, fudgy bite that practically melts on contact. The secret? A delicate balance of butter, brown sugar, and a single egg yolk that locks in moisture without adding bulk. It’s the kind of brownie that doesn’t leave a trace on the spoon, yet it satisfies the craving like a hug in chocolate form. I dare you to taste this and not go back for seconds.
What makes this version stand out isn’t just the texture—it’s the confidence that comes with knowing exactly what each ingredient does. I’ve spent years tweaking brownie recipes, and this one is hands down the best version you'll ever make at home. Picture yourself pulling this out of the oven, the whole kitchen smelling incredible, and the moment you cut into it, the center oozes like a chocolate river. If you’ve ever struggled with brownies that are either too dry or too cakey, you’re not alone—and I’ve got the fix. And now the fun part: let me walk you through every single step — by the end, you'll wonder how you ever made it any other way.
What Makes This Version Stand Out
- Texture: The single egg yolk creates a rich, glossy center that melts instantly, while the butter keeps the edges tender. The result is a brownie that feels like a bite of velvet chocolate.
- Flavor: Light brown sugar caramelizes slightly, adding a subtle depth that balances the bitterness of cocoa. Vanilla extract rounds out the flavor without overpowering it.
- Convenience: Each brownie is baked in a small ramekin, making it a perfect on-the-go snack or a quick dessert after dinner.
- Ingredient Quality: Using real butter and high-quality cocoa powder elevates the flavor profile, making each bite feel indulgent.
- Versatility: The optional chocolate chips add a burst of gooeyness, but the base recipe stands strong on its own.
- Make‑ahead Potential: The batter can be prepared ahead of time and frozen; just bake when you’re ready, and it’s as good as fresh.
- Presentation: The single-serve format looks elegant on a plate, making it a great choice for a quick dessert or a sweet treat for a date.
- Healthier Choice: The use of light brown sugar and a single egg yolk keeps the calorie count lower than traditional recipes.
Inside the Ingredient List
The Flavor Base
Butter is the backbone of any fudgy dessert. It provides a silky mouthfeel and a rich, nutty flavor that caramelizes slightly during baking. If you replace it with margarine, the brownie will lack that depth and the edges will become rubbery. When choosing butter, opt for a 80% or 90% butter for maximum flavor; a 100% butter is a bit too buttery and can make the batter too thick.
Light brown sugar is the sweetener that adds caramel undertones without making the brownie too sweet. Its molasses content gives a subtle complexity that balances the bitterness of cocoa. If you’re watching your sugar intake, you can swap it for coconut sugar or a sugar substitute that has a similar molasses flavor, but expect a slight change in texture.
The Texture Crew
The egg yolk is the secret to that luscious, gooey center. Unlike whole eggs, yolks provide fat and emulsifiers that keep the batter cohesive without adding moisture that would make the brownie cakey. Skipping the yolk will result in a denser, drier product. If you’re allergic to eggs, try using a flax egg (1 tbsp ground flaxseed + 3 tbsp water) to maintain structure.
Vanilla extract, though used in a small amount, acts as a flavor enhancer, brightening the chocolate and bringing out the caramel notes from the sugar. Use a pure vanilla extract for the best aroma; imitation vanilla can leave a chemical aftertaste. A drop of bourbon or rum can replace vanilla for a boozy twist, but keep it subtle to avoid overpowering the chocolate.
The Unexpected Star
Cocoa powder is the star that gives the brownie its deep chocolate flavor. A high-quality Dutch‑process cocoa has a slightly lower acidity, resulting in a smoother, less bitter taste. If you prefer a more intense flavor, choose a natural cocoa powder, but be prepared for a slightly sharper finish. A pinch of sea salt balances the sweetness and brings out the richness.
The Final Flourish
All-purpose flour provides structure without making the brownie too dense. The gluten formed during mixing gives the brownie a slight chewiness that balances the gooeyness from the yolk. Use just enough flour to bind the batter; too much will make it dry. If you want a gluten-free version, swap with a 1:1 gluten-free blend that contains xanthan gum.
Optional chocolate chips add a gooey, melty texture that makes every bite feel indulgent. They also give a pleasant crunch when you bite into them. If you’re looking for a healthier option, use dark chocolate chips with at least 70% cacao; they’ll reduce the sugar content while adding a richer flavor.
Everything's prepped? Good. Let's get into the real action...
The Method — Step by Step
- Preheat your oven to 350°F (175°C). Line a 4‑inch ramekin with parchment paper, leaving some overhang for easy removal. This step ensures the brownie doesn’t stick and gives you a clean release. I’ve found that a small amount of coconut oil on the paper also adds a subtle tropical hint.
- In a small saucepan, melt the butter over low heat. Add the light brown sugar and stir until the mixture becomes glossy and the sugar dissolves completely. This creates a buttery caramel base that will coat the batter like velvet. Keep the heat low to avoid scorching.
- Remove the pan from heat and whisk in the egg yolk until the mixture is smooth and pale. The yolk will emulsify with the butter, creating a silky batter. Don’t rush; a slow incorporation ensures a consistent texture.
Kitchen Hack: If you’re worried about the yolk curdling, add a teaspoon of warm milk before whisking. The liquid helps the yolk blend smoothly.
- Stir in the vanilla extract, cocoa powder, all‑purpose flour, and a pinch of sea salt. Mix until just combined; overmixing can develop gluten and make the brownie tough. The batter should be thick but pourable. The cocoa will give a deep chocolate color that looks irresistible.
- Fold in the chocolate chips, reserving a few for topping if you like. This step adds pockets of molten chocolate that burst with each bite. If you prefer a single‑flavor brownie, skip the chips entirely; the base will still be decadent.
-
Carefully pour the batter into the prepared ramekin, smoothing the top with a spatula. The batter should fill the ramekin about three‑quarters full, allowing room for rise. If you overfill, the brownie will overflow and create a mess.Watch Out: The batter can quickly over‑whisk; keep an eye on the texture. A thick, glossy batter is ideal, not a stiff, dry one.
- Bake for 15–18 minutes, or until the edges set but the center still looks slightly wet. A toothpick inserted in the center should come out with a few moist crumbs. The aroma will fill the kitchen, and you’ll know you’re close.
- Remove the brownie from the oven and let it cool in the ramekin for 5 minutes. This allows the interior to set properly. Afterward, lift it out using the parchment overhang and place it on a plate. Serve warm or let it cool completely; both are delicious.
That's it — you did it. But hold on, I've got a few more tricks that'll take this to another level. Keep reading to learn how to elevate the flavor and texture even further.
Insider Tricks for Flawless Results
The Temperature Rule Nobody Follows
Most people bake brownies at 350°F, but that can result in a slightly dry center. Lowering the temperature to 325°F and extending the bake time to 18–20 minutes gives a moister, silkier outcome. The lower heat allows the butter to melt evenly without caramelizing too quickly, preserving the fudgy texture.
Why Your Nose Knows Best
Your sense of smell is a reliable guide to doneness. When the batter begins to emit a nutty, chocolatey aroma, it’s a sign that the sugars are caramelizing just right. If the smell is overwhelmingly sweet, the brownie may be overbaked. Trust your nose to avoid the dreaded burnt edge.
The 5‑Minute Rest That Changes Everything
Letting the brownie rest for five minutes before serving allows the internal structure to set, preventing it from falling apart. During this brief pause, the residual heat completes the cooking process, creating a perfect balance between gooey center and firm edges. Skip this step and you’ll end up with a brownie that feels like a wet sponge.
Add a Splash of Water for Extra Moisture
If you’re making the recipe in advance, add a tablespoon of water to the batter before baking. This trick keeps the brownie from drying out when stored. The water creates steam during baking, which helps maintain a moist crumb.
The Final Flourish: A Dusting of Cocoa Powder
After the brownie has cooled, dust the top with a light sprinkle of cocoa powder. This not only enhances the chocolate flavor but also gives the brownie a professional finish. A pinch of sea salt on top before baking can elevate the taste even further.
Creative Twists and Variations
This recipe is a playground. Here are some of my favorite ways to switch things up:
Nutty Crunch
Add 2 tbsp chopped walnuts or pecans to the batter for a crunchy texture. The nuts provide a subtle caramel flavor that complements the chocolate. This variation is perfect for those who love a bit of bite in their dessert.
Spiced Surprise
Stir in a pinch of cinnamon or a dash of cayenne pepper. The warmth of cinnamon adds depth, while cayenne gives a subtle heat that balances the sweetness. It’s a great way to add complexity without changing the base recipe.
Salted Caramel Swirl
Swirl in 2 tbsp salted caramel sauce before baking. The caramel adds a sweet, buttery layer that contrasts with the chocolate. The result is a brownie that feels indulgent and sophisticated.
Coffee Infusion
Replace vanilla extract with 1 tsp espresso powder. The coffee intensifies the chocolate flavor and adds a subtle bitterness that balances the sweetness. This version is ideal for coffee lovers who want a richer dessert.
Minty Fresh
Add a drop of peppermint extract to the batter. The mint gives a refreshing aftertaste that pairs wonderfully with chocolate. It’s a fun twist for spring or summer desserts.
Vegan Version
Use coconut oil instead of butter, maple syrup for sugar, and a flax egg. Replace the egg yolk with a flaxseed mixture and use vegan chocolate chips. The texture remains fudgy, and the flavor stays robust.
Storing and Bringing It Back to Life
Fridge Storage
Cool the brownie completely before placing it in an airtight container. Store in the refrigerator for up to 5 days. The moisture from the fridge helps maintain the fudgy texture. When ready to eat, let it sit at room temperature for 10 minutes to soften.
Freezer Friendly
Wrap the brownie tightly in plastic wrap, then place it in a freezer bag. It will keep well for up to 3 months. Thaw in the refrigerator overnight for best results. A quick reheating in the microwave for 10–15 seconds brings back that fresh‑baked aroma.
Best Reheating Method
If you want that warm, gooey center again, preheat your oven to 300°F and bake the frozen brownie for 10 minutes. For a quicker option, microwave on medium for 20 seconds. Add a tiny splash of water before reheating to create steam and keep the brownie moist.