
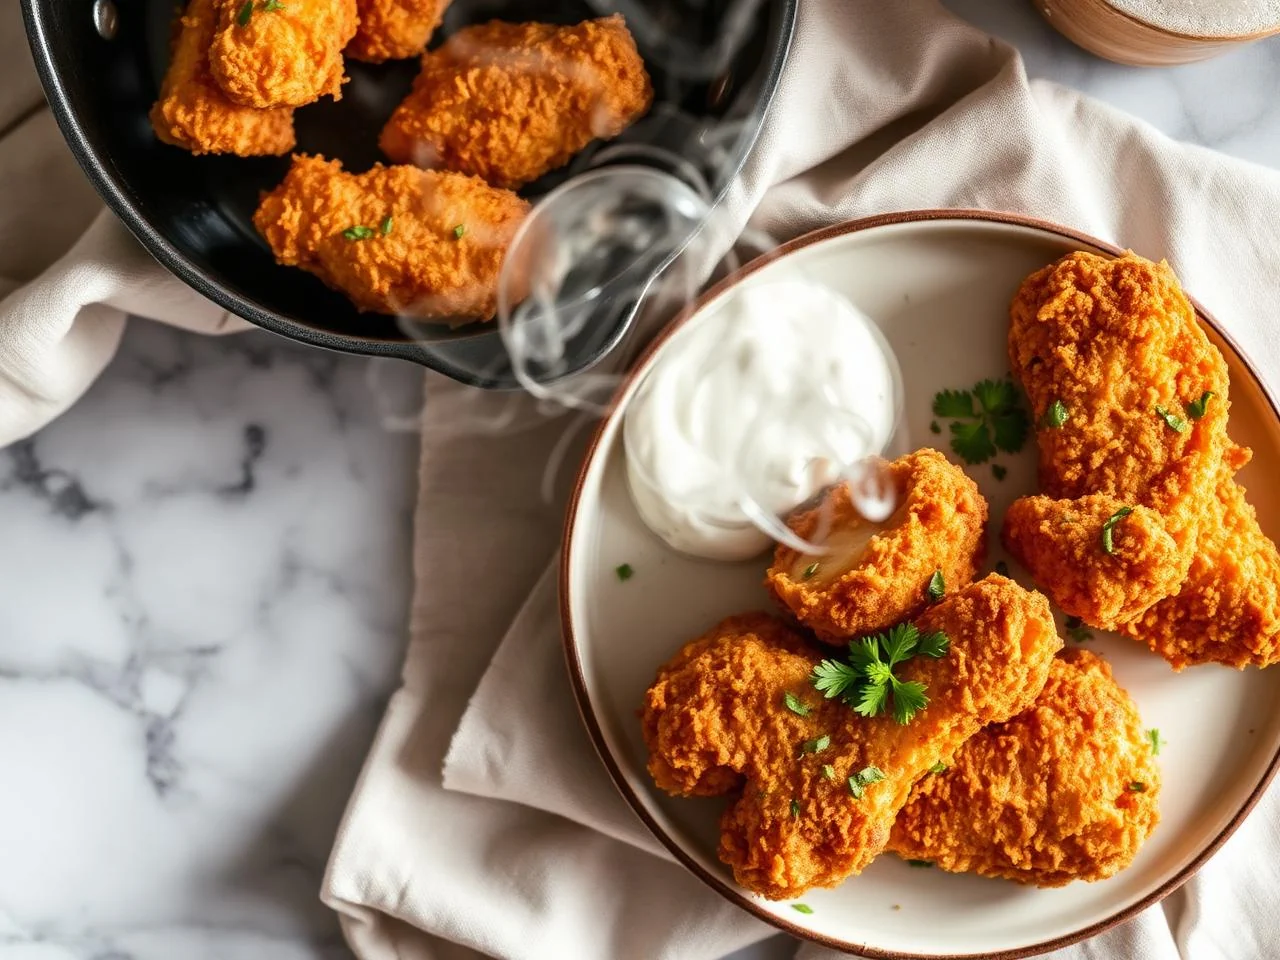
Crispy Chicken Fingers
I still remember the first time I made crispy chicken fingers for my family. The kids were thrilled, and my husband asked for seconds (and thirds!). It was one of those moments that reminded me why I love cooking so much - the joy of bringing people together with a delicious meal.
Since then, I've perfected my recipe for crispy chicken fingers, and it's become a staple in our household. The best part? It's incredibly easy to make, and the ingredients are probably already in your pantry.
One of the things that sets this recipe apart is the combination of a light batter and a crispy exterior. The result is a tender and juicy interior, surrounded by a crunchy and flavorful exterior. It's a match made in heaven!
I love making crispy chicken fingers for my family because it's a meal that everyone can enjoy together. Whether we're having a quick weeknight dinner or a weekend gathering, these chicken fingers are always a hit.
In this recipe, I'll show you how to make crispy chicken fingers that are perfect for any occasion. From the ingredients to the cooking technique, I'll guide you through every step of the way. So, let's get started and make some delicious crispy chicken fingers!
Why You’ll Love This Recipe
- These crispy chicken fingers are easy to make and require minimal ingredients.
- They're perfect for a quick weeknight dinner or a weekend gathering.
- The combination of a light batter and a crispy exterior makes them a crowd-pleaser.
- You can customize the recipe to suit your taste preferences by adding different seasonings or herbs.
- They're a great option for a family meal, as they're easy to make in large quantities.
- They're also a great option for a party or special occasion, as they're easy to make ahead of time and can be served hot or cold.
Why This Recipe Works
The secret to making crispy chicken fingers lies in the combination of a light batter and a hot skillet. When you coat the chicken in a light batter, it helps to create a crispy exterior without overpowering the flavor of the chicken.
Another important factor is the temperature of the skillet. When you heat the skillet to the right temperature, it helps to sear the chicken and create a crispy exterior. This is why it's essential to use a thermometer to ensure that the oil has reached the correct temperature.
Finally, the type of oil you use is also crucial. I recommend using a neutral-tasting oil with a high smoke point, such as peanut or avocado oil. This will help to prevent the oil from burning or smoking, which can affect the flavor and texture of the chicken.
By following these tips and using the right ingredients, you'll be able to make crispy chicken fingers that are sure to please even the pickiest eaters.
Ingredients You’ll Need
To make crispy chicken fingers, you'll need a few simple ingredients. The most important ingredient is, of course, the chicken. I recommend using chicken breast or tenderloins, as they're tender and easy to work with.
In addition to the chicken, you'll need a few pantry staples, including flour, eggs, and breadcrumbs. You'll also need some oil for frying, as well as some seasonings to add flavor to the chicken.
- 1 lb (450g) chicken breast or tenderloinsI recommend using chicken breast or tenderloins, as they're tender and easy to work with. You can also use chicken thighs if you prefer.
- 1 cup (120g) all-purpose flourThe flour is used to coat the chicken and help the batter stick. You can also use gluten-free flour if you need to.
- 2 eggsThe eggs are used to help the batter stick to the chicken. You can also use egg substitutes if you need to.
- 1 cup (120g) panko breadcrumbsThe panko breadcrumbs are used to add crunch to the chicken. You can also use regular breadcrumbs if you don't have panko.
- 1/2 cup (60g) grated Parmesan cheeseThe Parmesan cheese is used to add flavor to the chicken. You can also use other types of cheese if you prefer.
- 1/4 cup (30g) chopped fresh parsleyThe parsley is used to add freshness to the chicken. You can also use other herbs if you prefer.
- 2 cloves garlic, mincedThe garlic is used to add flavor to the chicken. You can also use garlic powder if you don't have fresh garlic.
- 1/2 tsp (2g) saltThe salt is used to add flavor to the chicken. You can also use other types of salt if you prefer.
- 1/4 tsp (1g) black pepperThe black pepper is used to add flavor to the chicken. You can also use other types of pepper if you prefer.
- 1 cup (240ml) buttermilkThe buttermilk is used to marinate the chicken and add moisture. You can also use regular milk if you don't have buttermilk.
- 1/2 cup (120ml) peanut oilThe peanut oil is used for frying the chicken. You can also use other types of oil with a high smoke point if you prefer.
Equipment You’ll Need
How to Make Crispy Chicken Fingers
- 1In a large bowl, whisk together the flour, eggs, and buttermilk to make the batter. The batter should be smooth and free of lumps.
- 2Add the chicken to the batter and toss to coat. Make sure the chicken is fully coated in the batter.
- 3In a separate bowl, mix together the panko breadcrumbs, Parmesan cheese, parsley, garlic, salt, and pepper.
- 4Remove the chicken from the batter and coat in the breadcrumb mixture, pressing the crumbs onto the chicken to help them stick.
- 5Heat the peanut oil in a large heavy skillet or wok over medium-high heat until it reaches 350°F (175°C).
- 6Carefully place the coated chicken fingers in the hot oil and fry for 5-7 minutes on each side, or until they reach an internal temperature of 165 F (74 C). Use an instant-read thermometer to check the temperature.
- 7Remove the chicken fingers from the oil and place them on a paper towel-lined plate to drain excess oil.
- 8Let the chicken fingers rest for 5 minutes before serving. This will help the juices to redistribute and the chicken to stay tender.
- 9Serve the crispy chicken fingers hot and enjoy!
- 10If you want to make the chicken fingers extra crispy, you can broil them in the oven for an additional 2-3 minutes after frying. Keep an eye on them to make sure they don't burn.
- 11To make the chicken fingers ahead of time, you can prepare the batter and breadcrumb mixture up to a day in advance. Simply store them in the refrigerator until you're ready to use them.
Expert Tips
- Make sure the oil is hot enough before adding the chicken. If the oil is not hot enough, the chicken will absorb too much oil and be greasy.
- Don't overcrowd the skillet. Fry the chicken fingers in batches if necessary, to ensure they have enough room to cook evenly.
- Use a thermometer to ensure the oil has reached the correct temperature. This will help the chicken to cook evenly and prevent it from burning.
- Don't overcook the chicken. The internal temperature should be 165 F (74 C), but the chicken should still be juicy and tender.
- Let the chicken rest before serving. This will help the juices to redistribute and the chicken to stay tender.
- Experiment with different seasonings and herbs to add more flavor to the chicken. You can also try using different types of cheese or breadcrumbs to change up the flavor.
Common Mistakes to Avoid
- Not heating the oil to the correct temperature. This can cause the chicken to absorb too much oil and be greasy.
- Overcrowding the skillet. This can cause the chicken to cook unevenly and be greasy.
- Not using a thermometer. This can cause the oil to be too hot or too cold, which can affect the texture and flavor of the chicken.
- Overcooking the chicken. This can cause the chicken to be dry and tough.
- Not letting the chicken rest before serving. This can cause the chicken to be dry and tough.
Variations and Substitutions
- Try using different types of cheese, such as cheddar or mozzarella, to add more flavor to the chicken.
- Experiment with different herbs and spices, such as paprika or cayenne pepper, to add more flavor to the chicken.
- Use different types of breadcrumbs, such as gluten-free or whole wheat, to change up the texture and flavor of the chicken.
- Try using different types of oil, such as avocado or grapeseed, to change up the flavor and texture of the chicken.
- Add some heat to the chicken by using hot sauce or red pepper flakes in the batter.
- Try using different types of chicken, such as chicken thighs or tenders, to change up the texture and flavor of the dish.
What to Serve With Crispy Chicken Fingers
Crispy chicken fingers are a versatile dish that can be served with a variety of sides and dips. Some of my favorite ways to serve them include with a side of mashed potatoes and steamed vegetables, or with a dipping sauce like honey mustard or ranch dressing.
You can also serve them as a snack or appetizer, paired with a side of celery sticks and blue cheese dressing. The possibilities are endless, and I'm sure you'll find a way to serve them that your family will love.
Make-Ahead, Storage, Freezing and Reheating
If you want to make the crispy chicken fingers ahead of time, you can prepare the batter and breadcrumb mixture up to a day in advance. Simply store them in the refrigerator until you're ready to use them.
Once the chicken fingers are cooked, you can store them in an airtight container in the refrigerator for up to 3 days. Simply reheat them in the oven or microwave until they're crispy and hot.
You can also freeze the cooked chicken fingers for up to 2 months. Simply place them in a single layer on a baking sheet and freeze until solid, then transfer them to a freezer-safe bag or container. To reheat, simply bake them in the oven until they're crispy and hot.
One of the best things about crispy chicken fingers is that they're easy to reheat and serve. You can reheat them in the oven, microwave, or even on the stovetop. Simply heat them until they're crispy and hot, and serve with your favorite dipping sauce.
Frequently Asked Questions
What type of oil is best for frying crispy chicken fingers?
I recommend using a neutral-tasting oil with a high smoke point, such as peanut or avocado oil. This will help to prevent the oil from burning or smoking, which can affect the flavor and texture of the chicken.
How do I know when the oil is hot enough?
You can use a thermometer to check the temperature of the oil. The ideal temperature for frying crispy chicken fingers is between 350°F (175°C) and 375°F (190°C).
Can I make crispy chicken fingers in the oven?
Yes, you can make crispy chicken fingers in the oven. Simply preheat the oven to 400°F (200°C) and bake the chicken fingers for 15-20 minutes, or until they're crispy and golden brown.
How do I store leftover crispy chicken fingers?
You can store leftover crispy chicken fingers in an airtight container in the refrigerator for up to 3 days. Simply reheat them in the oven or microwave until they're crispy and hot.
Can I freeze crispy chicken fingers?
Yes, you can freeze crispy chicken fingers. Simply place them in a single layer on a baking sheet and freeze until solid, then transfer them to a freezer-safe bag or container. To reheat, simply bake them in the oven until they're crispy and hot.
What's the best way to reheat crispy chicken fingers?
You can reheat crispy chicken fingers in the oven, microwave, or even on the stovetop. Simply heat them until they're crispy and hot, and serve with your favorite dipping sauce.
Can I make crispy chicken fingers ahead of time?
Yes, you can make crispy chicken fingers ahead of time. Simply prepare the batter and breadcrumb mixture up to a day in advance, and store them in the refrigerator until you're ready to use them.
How do I prevent the chicken fingers from becoming greasy?
To prevent the chicken fingers from becoming greasy, make sure the oil is hot enough before adding the chicken. You can also try using a thermometer to ensure the oil has reached the correct temperature.
Ingredients
- 1 lb (450g) chicken breast or tenderloins
- 1 cup (120g) all-purpose flour
- 2 eggs
- 1 cup (120g) panko breadcrumbs
- 1/2 cup (60g) grated Parmesan cheese
- 1/4 cup (30g) chopped fresh parsley
- 2 cloves garlic, minced
- 1/2 tsp (2g) salt
- 1/4 tsp (1g) black pepper
- 1 cup (240ml) buttermilk
- 1/2 cup (120ml) peanut oil
Instructions
- In a large bowl, whisk together the flour, eggs, and buttermilk to make the batter. The batter should be smooth and free of lumps.
- Add the chicken to the batter and toss to coat. Make sure the chicken is fully coated in the batter.
- In a separate bowl, mix together the panko breadcrumbs, Parmesan cheese, parsley, garlic, salt, and pepper.
- Remove the chicken from the batter and coat in the breadcrumb mixture, pressing the crumbs onto the chicken to help them stick.
- Heat the peanut oil in a large heavy skillet or wok over medium-high heat until it reaches 350°F (175°C).
- Carefully place the coated chicken fingers in the hot oil and fry for 5-7 minutes on each side, or until they reach an internal temperature of 165 F (74 C). Use an instant-read thermometer to check the temperature.
- Remove the chicken fingers from the oil and place them on a paper towel-lined plate to drain excess oil.
- Let the chicken fingers rest for 5 minutes before serving. This will help the juices to redistribute and the chicken to stay tender.
- Serve the crispy chicken fingers hot and enjoy!
- If you want to make the chicken fingers extra crispy, you can broil them in the oven for an additional 2-3 minutes after frying. Keep an eye on them to make sure they don't burn.
- To make the chicken fingers ahead of time, you can prepare the batter and breadcrumb mixture up to a day in advance. Simply store them in the refrigerator until you're ready to use them.